Make for Your Man… How to make a bow tie

14

Lots of people don’t believe in Valentines day and the way it has become so commercial, but I think if there is an excuse to tell someone you love them… why not take it!?

Bow Tie

So, just ditch the commercial bit and make something for your man this valentines. Handmade gifts are so thoughtful and he will love it… and look great in it too!

WHAT YOU NEED…

1

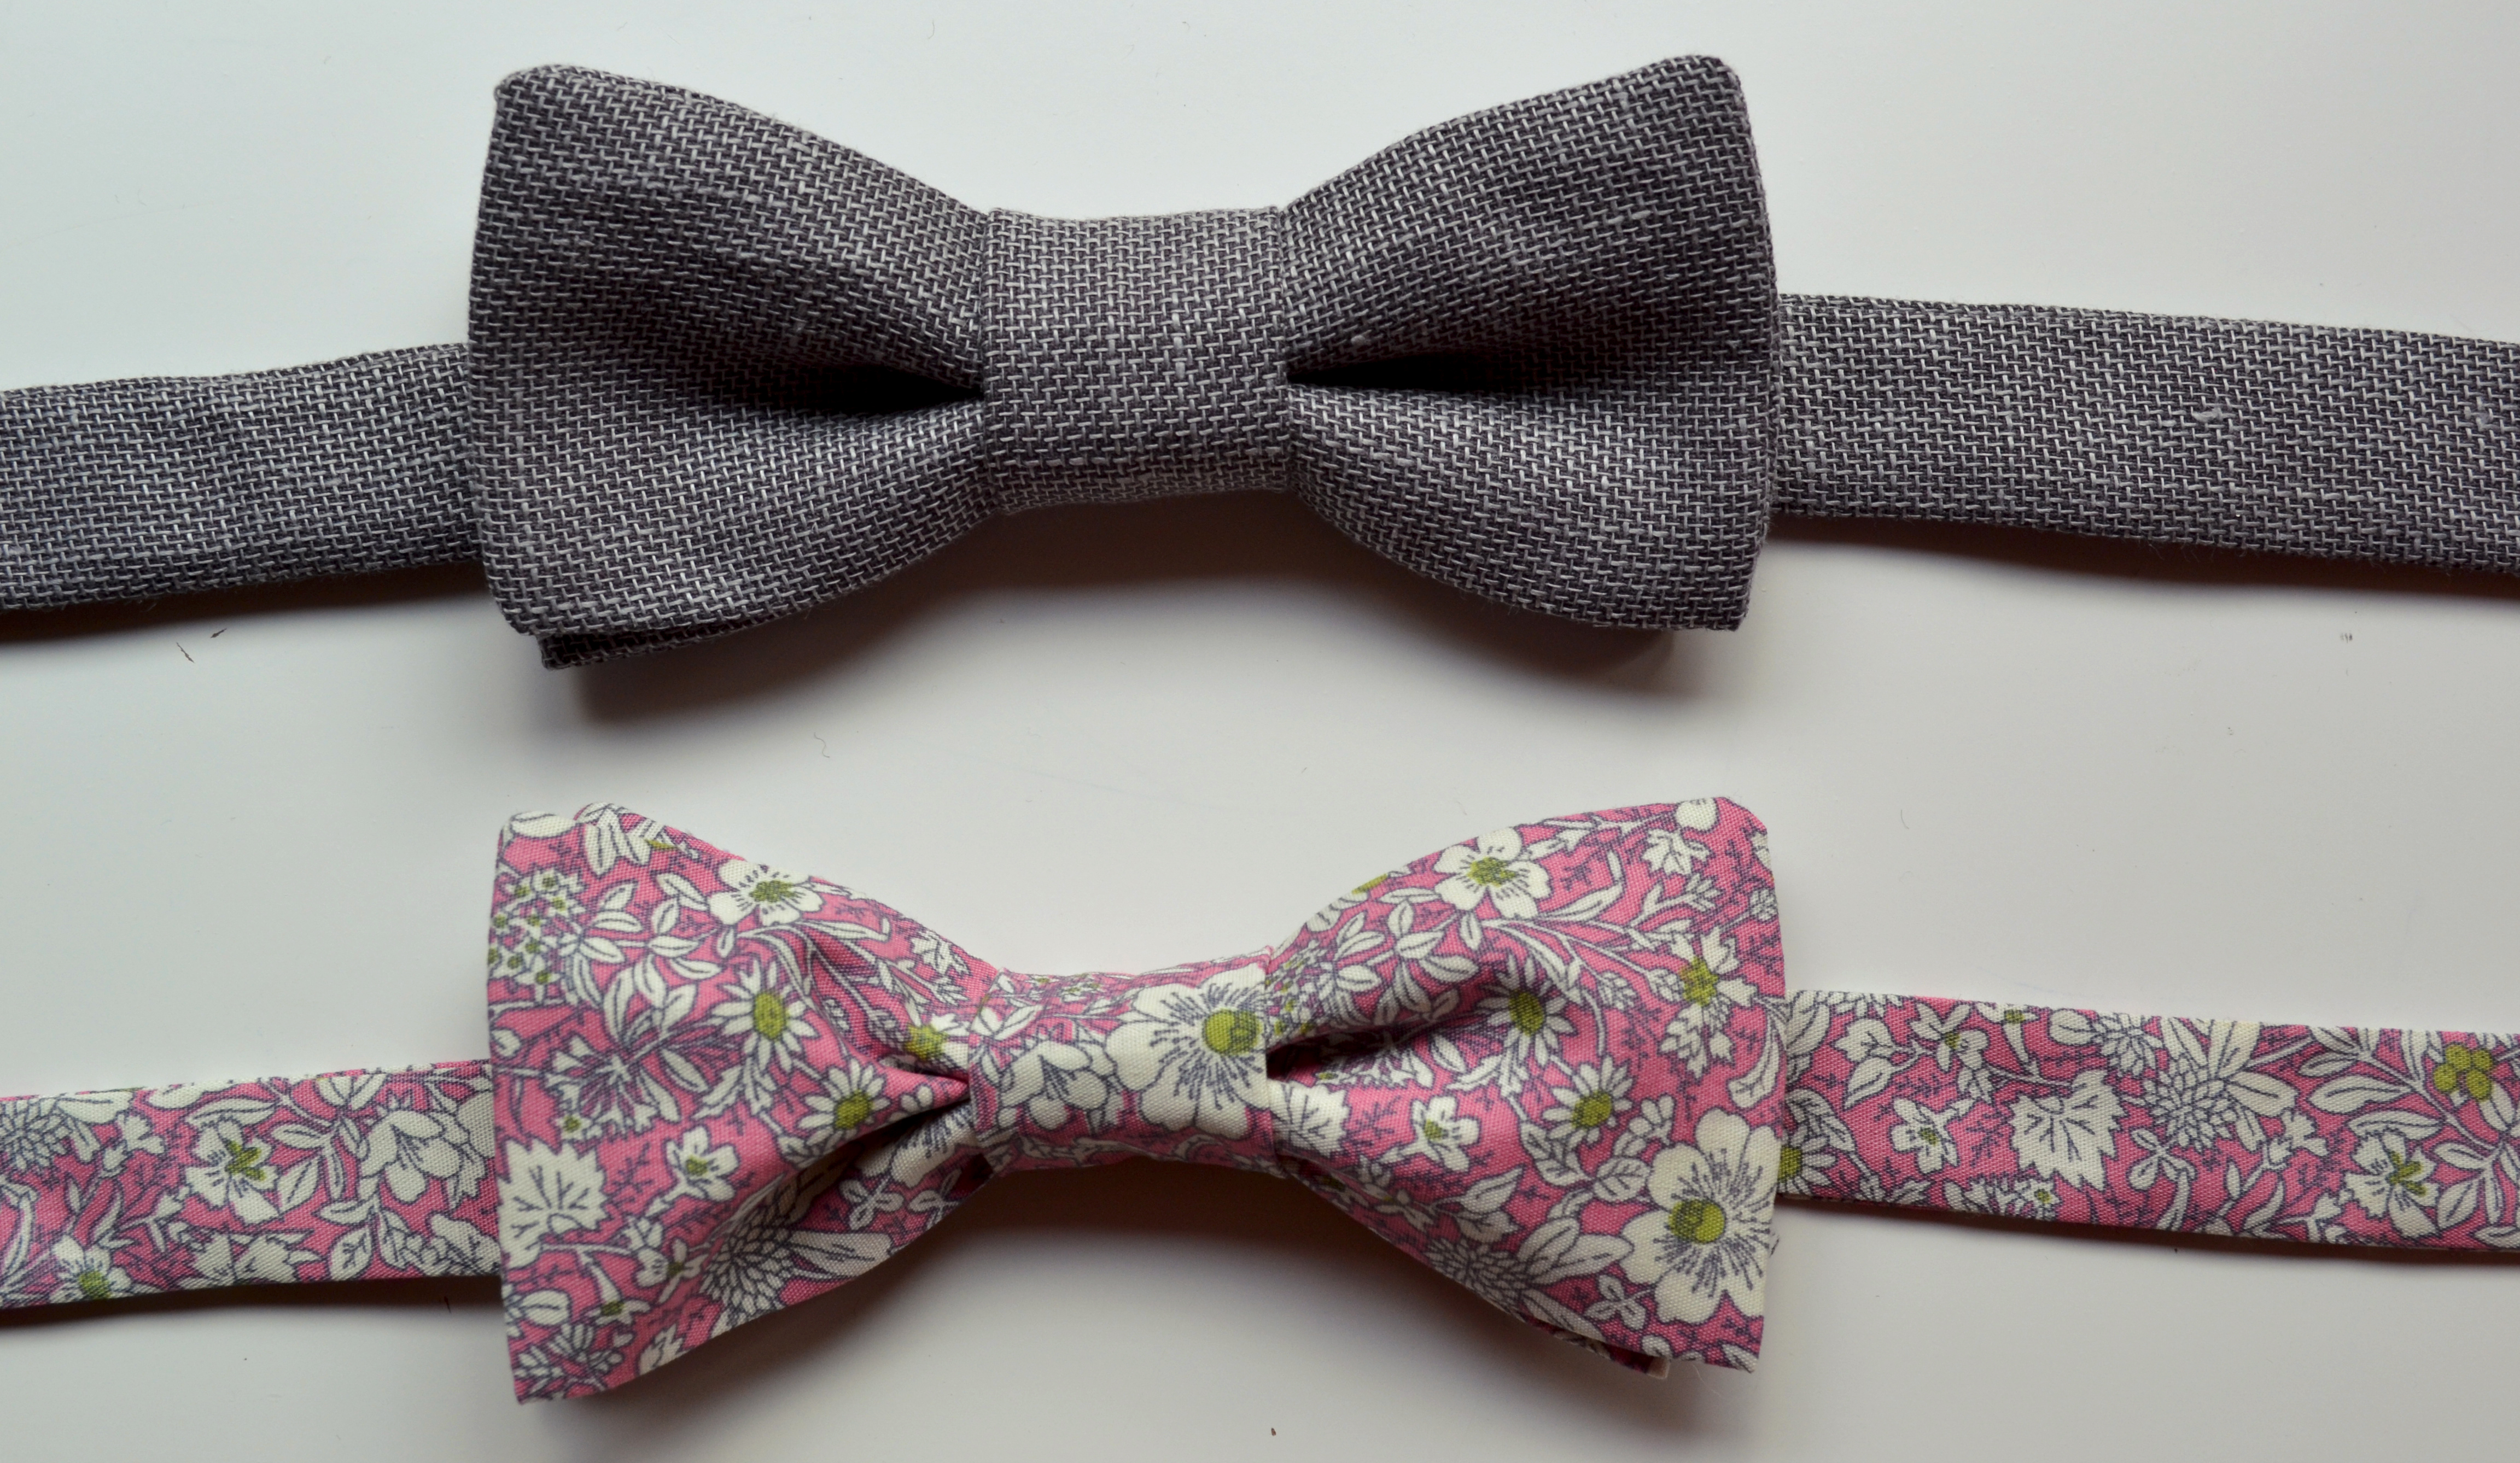
Fabric – if you use a thicker fabric your bow tie will be more plump! I have used a blue/grey linen for this example and I am really pleased with the results.

I got my linen from Fabworks in Dewsbury and the floral above from B&M Fabrics in Leeds Market.

CUTTING:

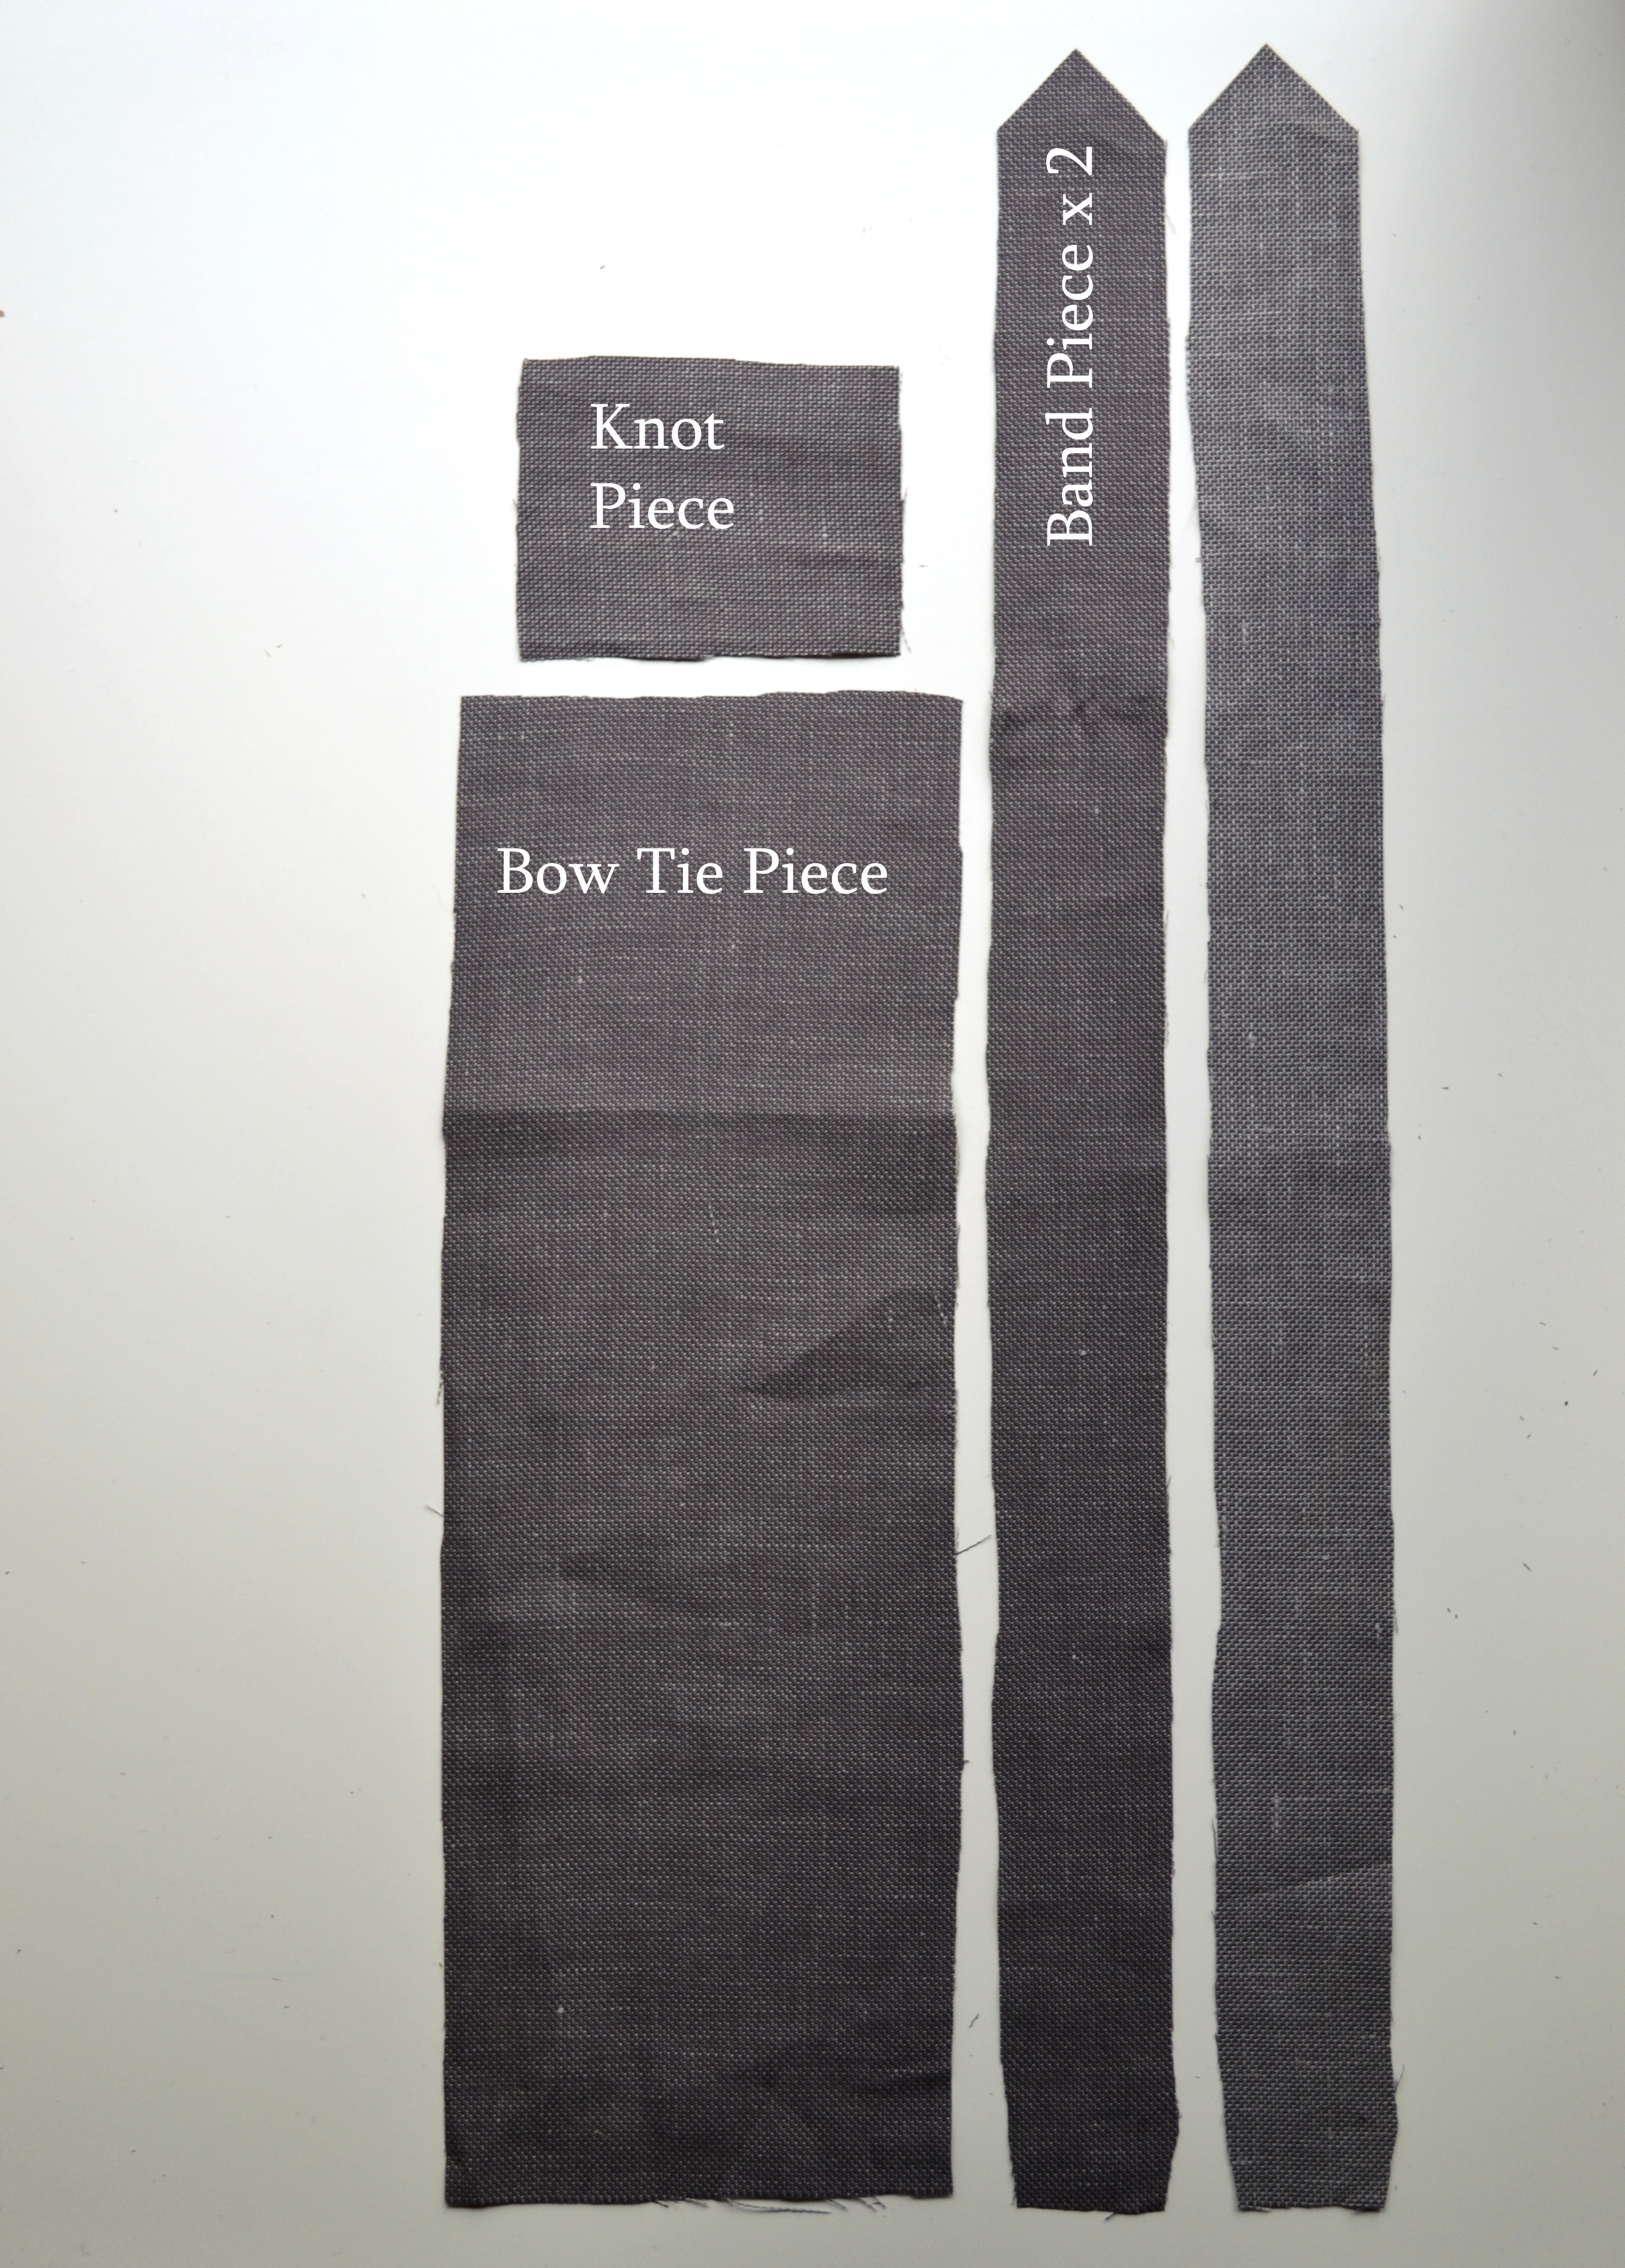
Cut pieces of fabric:
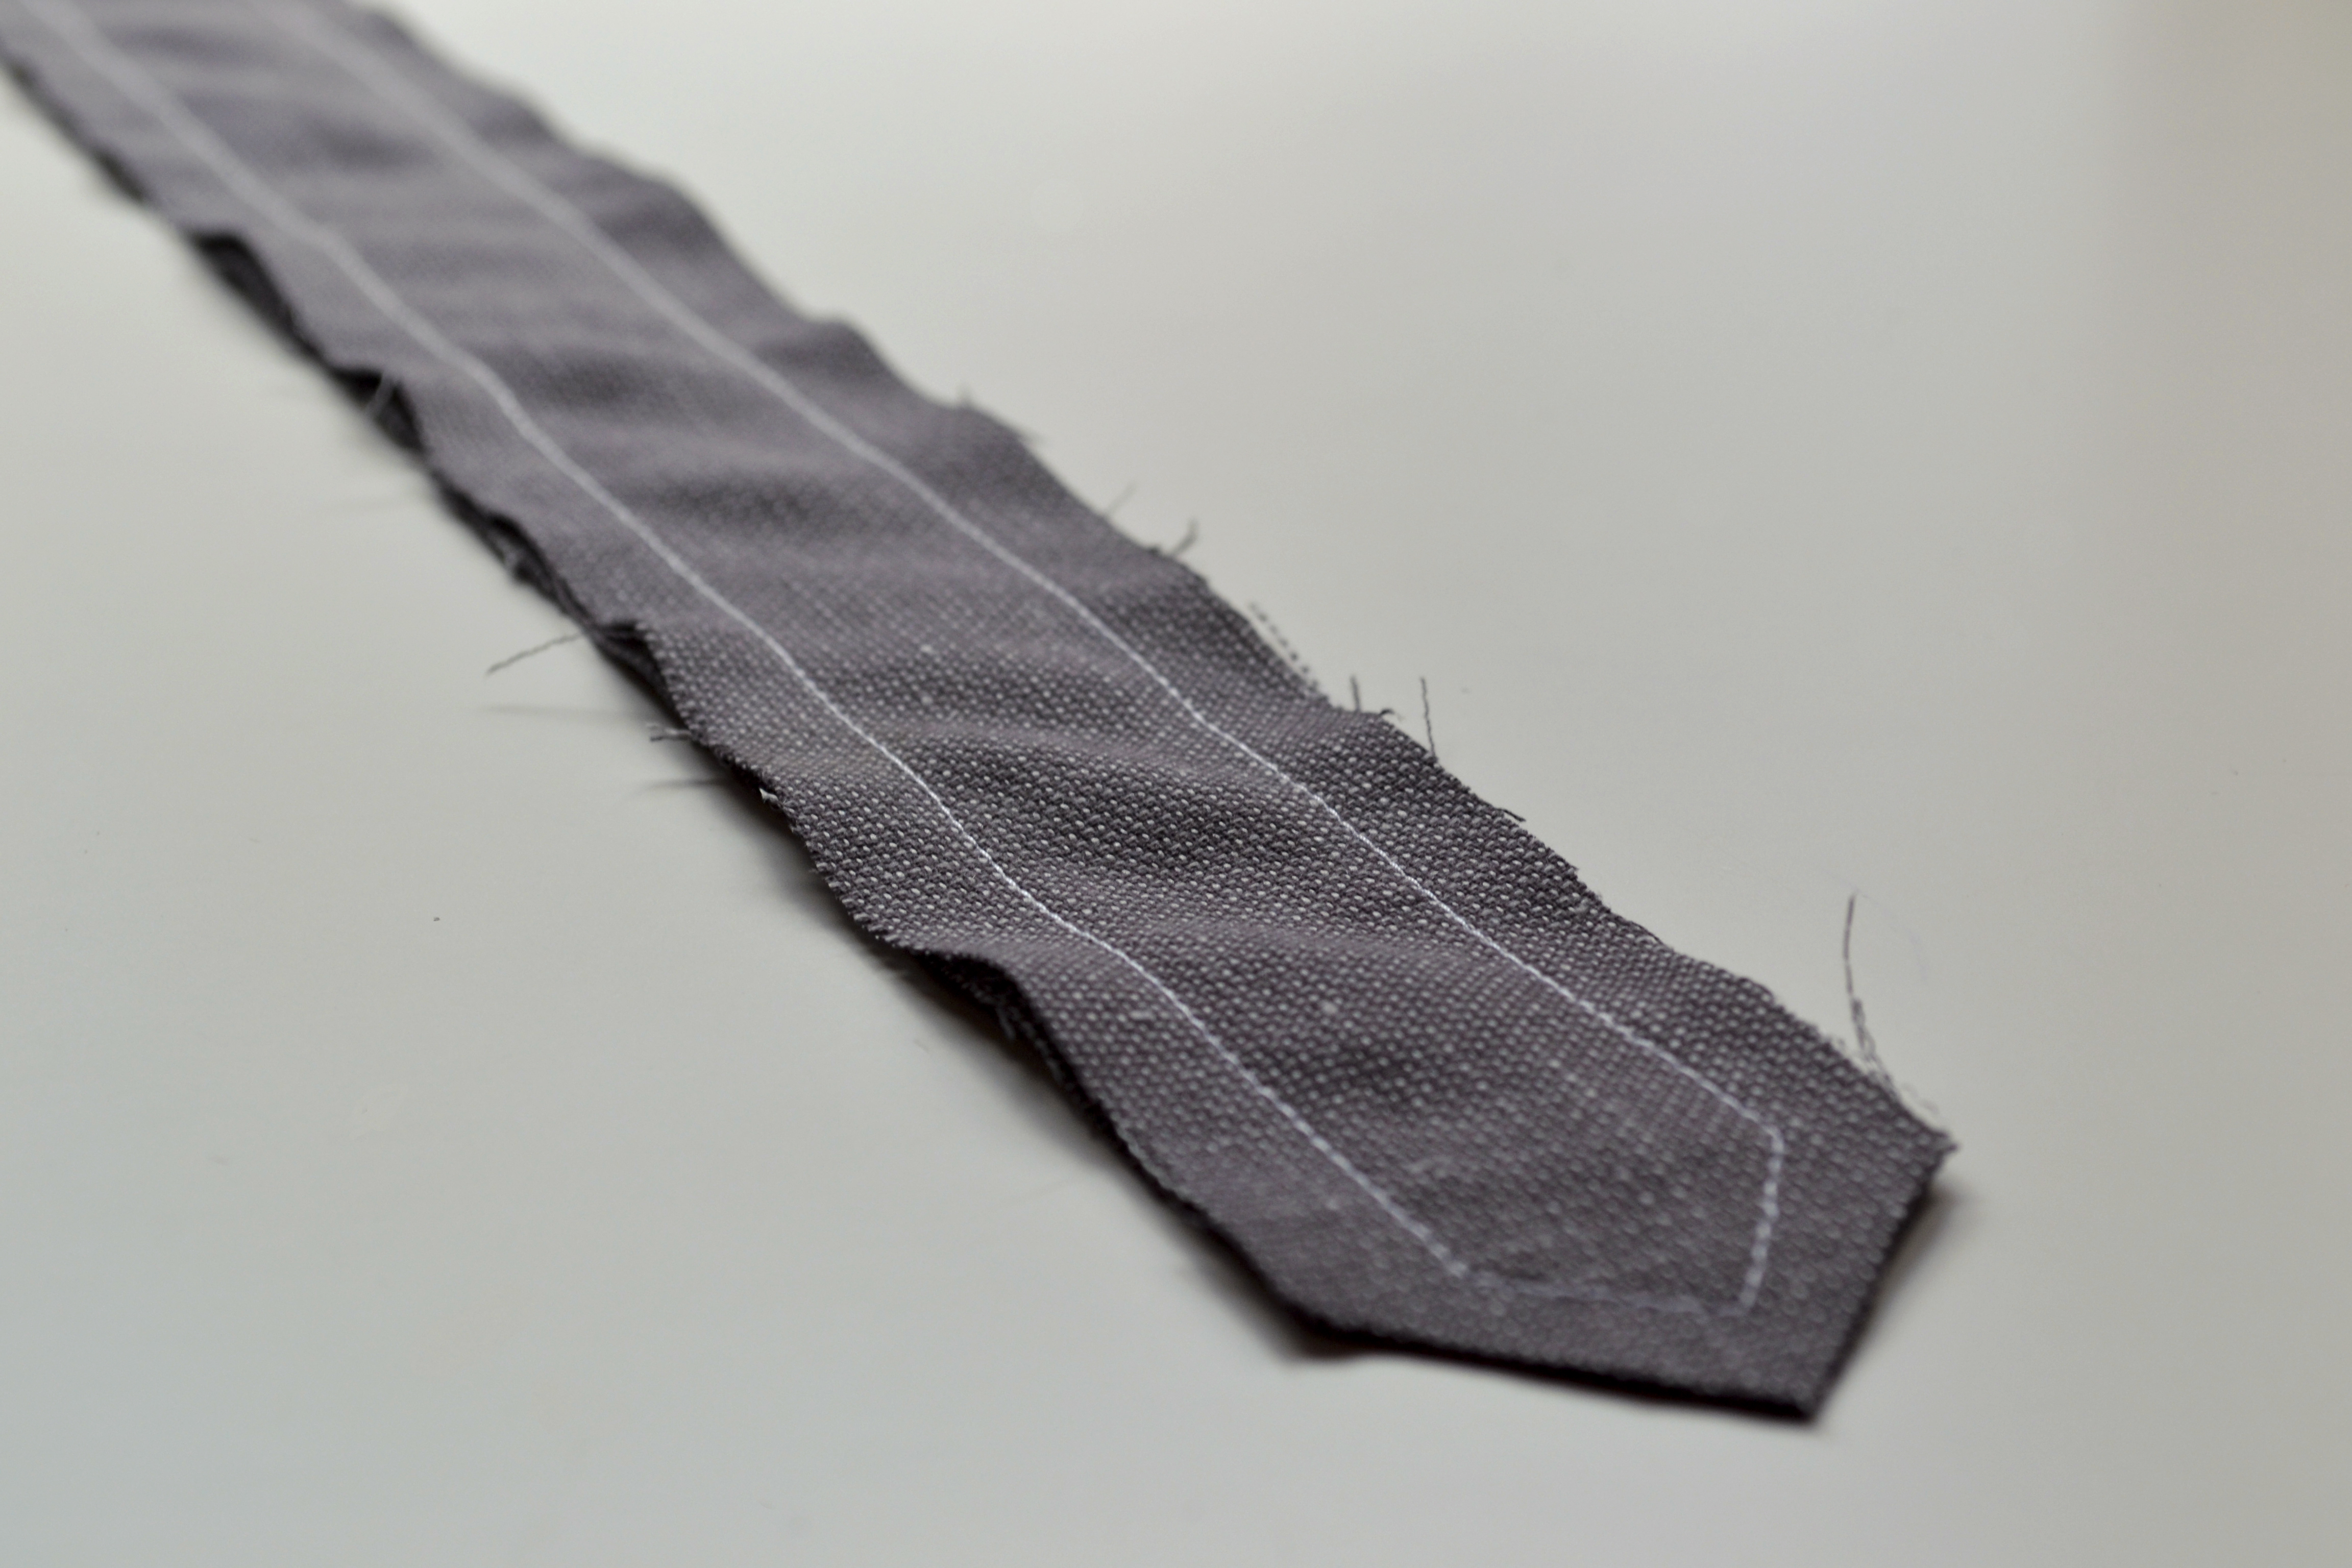
1 x Bow Tie: 12.5cm x 37.5cm
1 x Knot: 9cm x 7.5cm
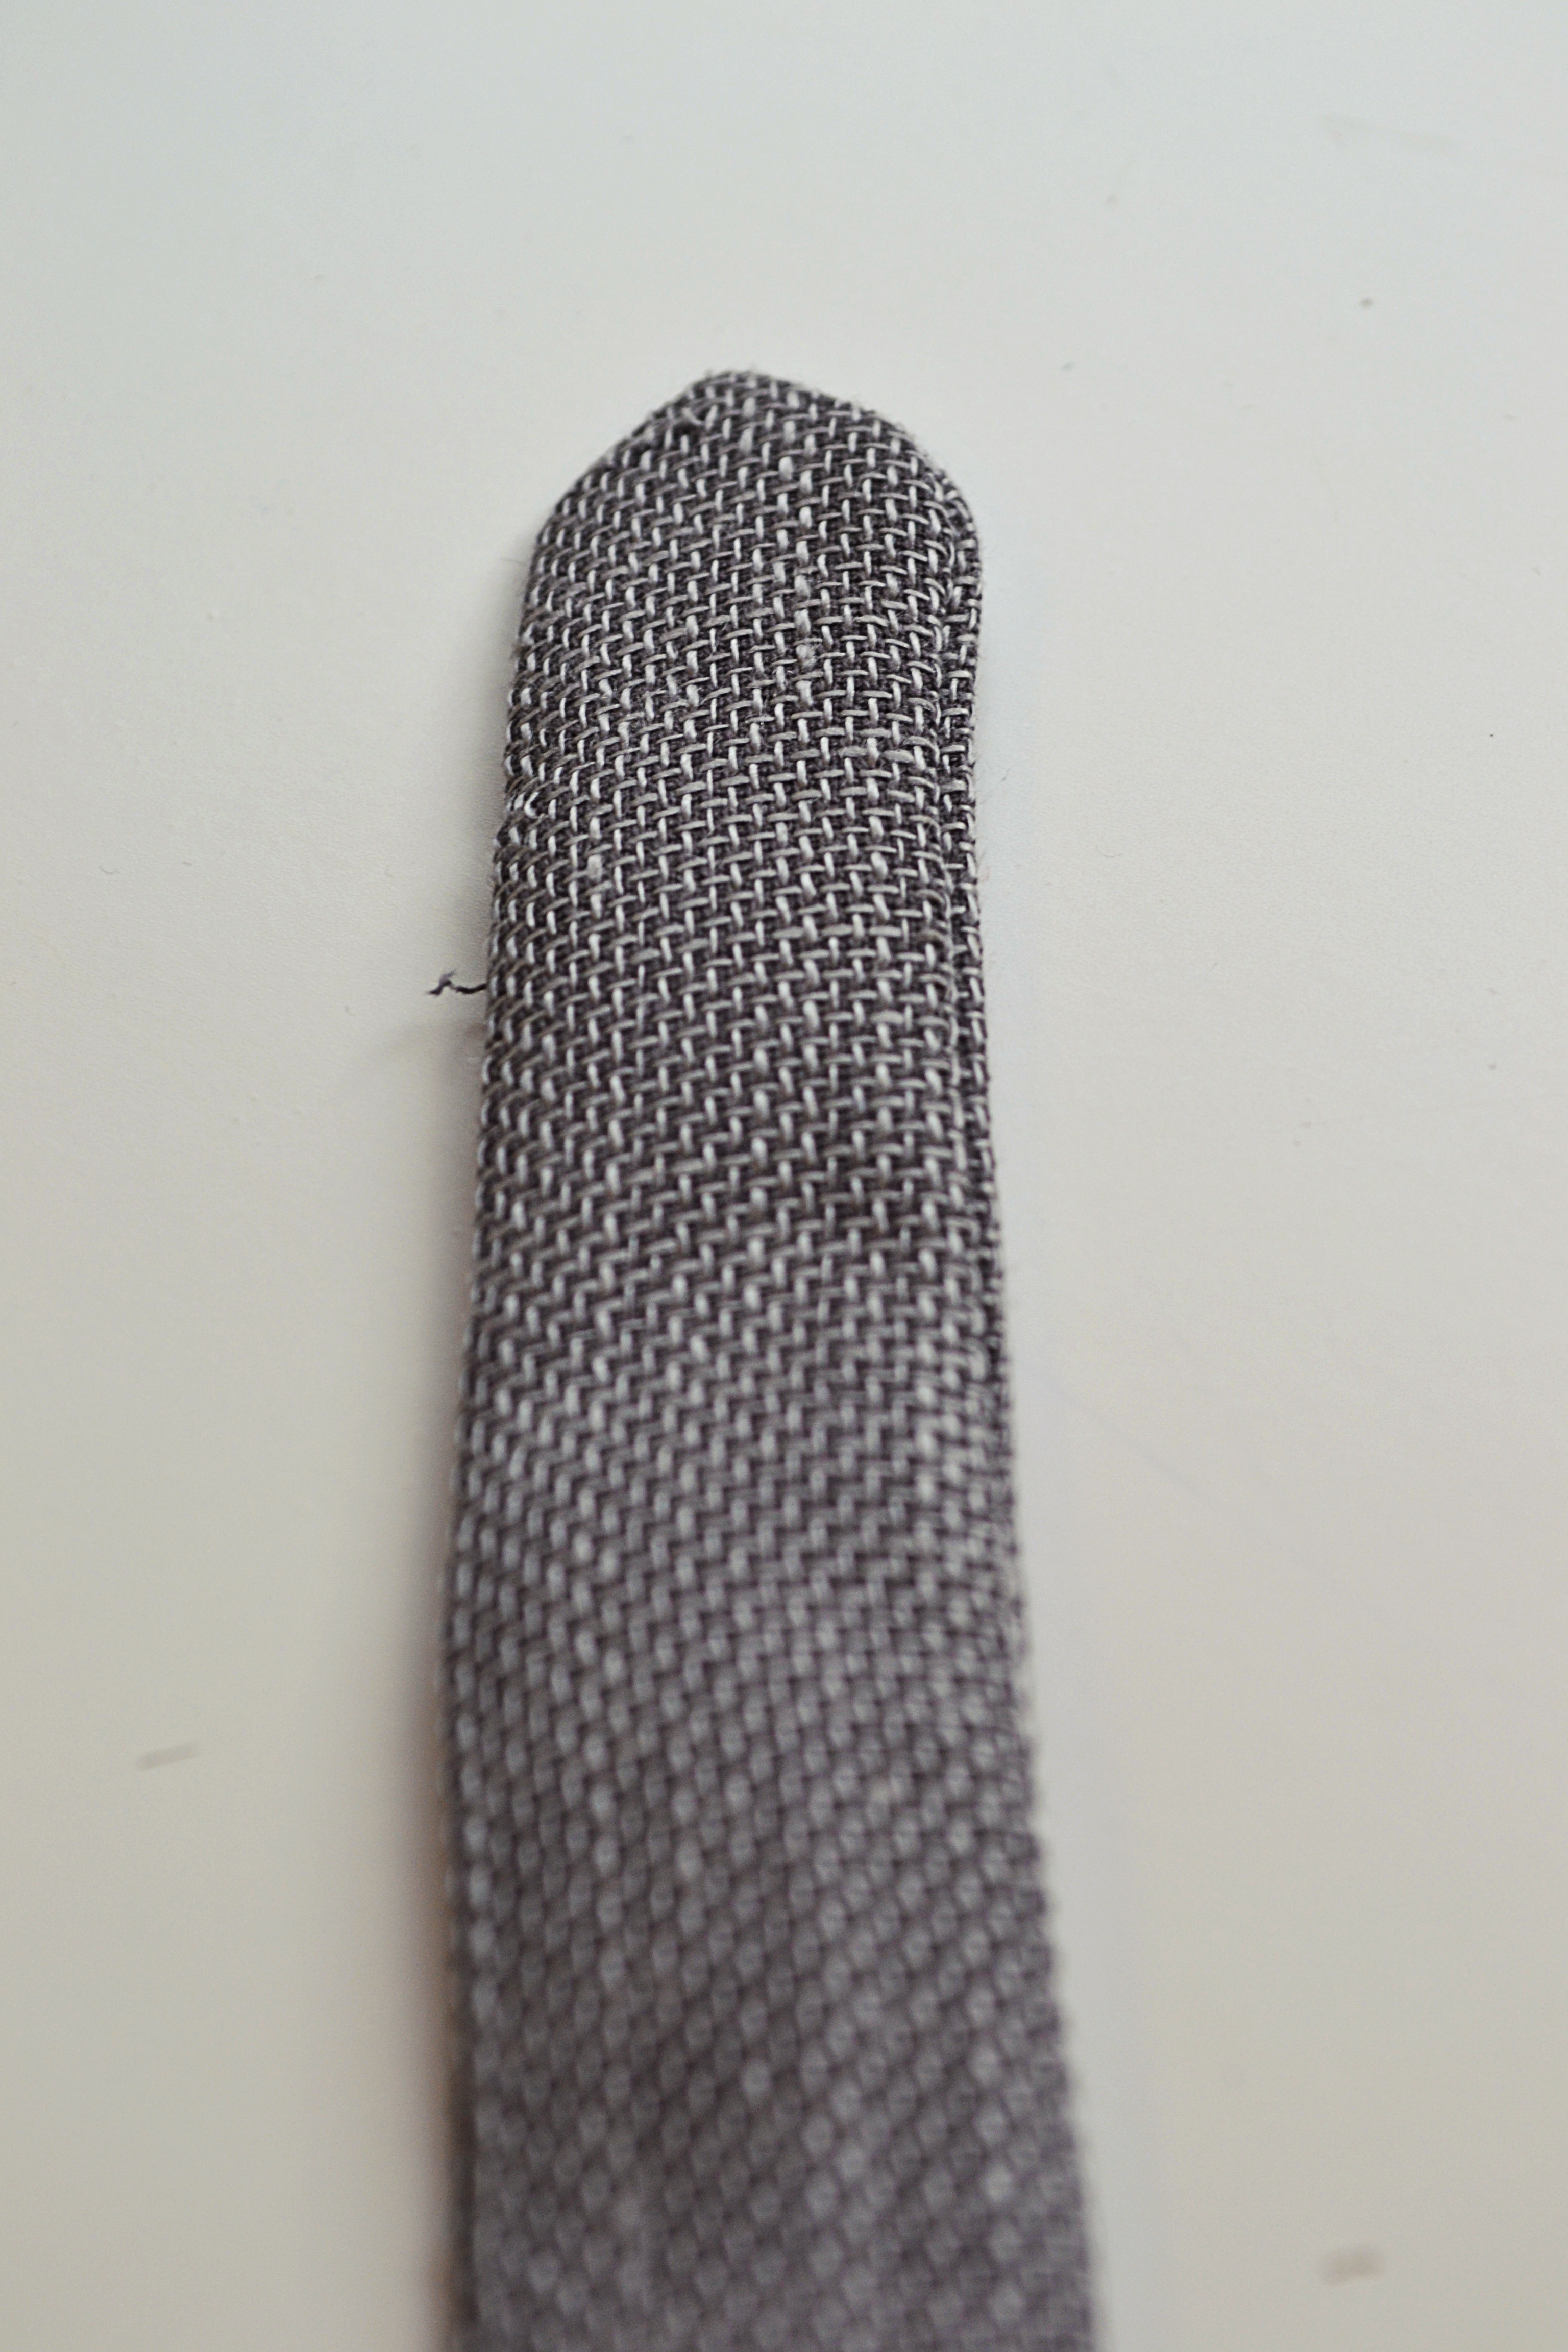
2 x Band = 54cm x 4cm (Cut this piece to a point at one end)

STITCHING:

1. With right sides together fold the Bow Tie piece in half length ways and press.
Stitch with a 1cm seam allowance around the cut edges, leaving a gap to turn through. Repeat with the knot piece.

Stitch and leave a gap

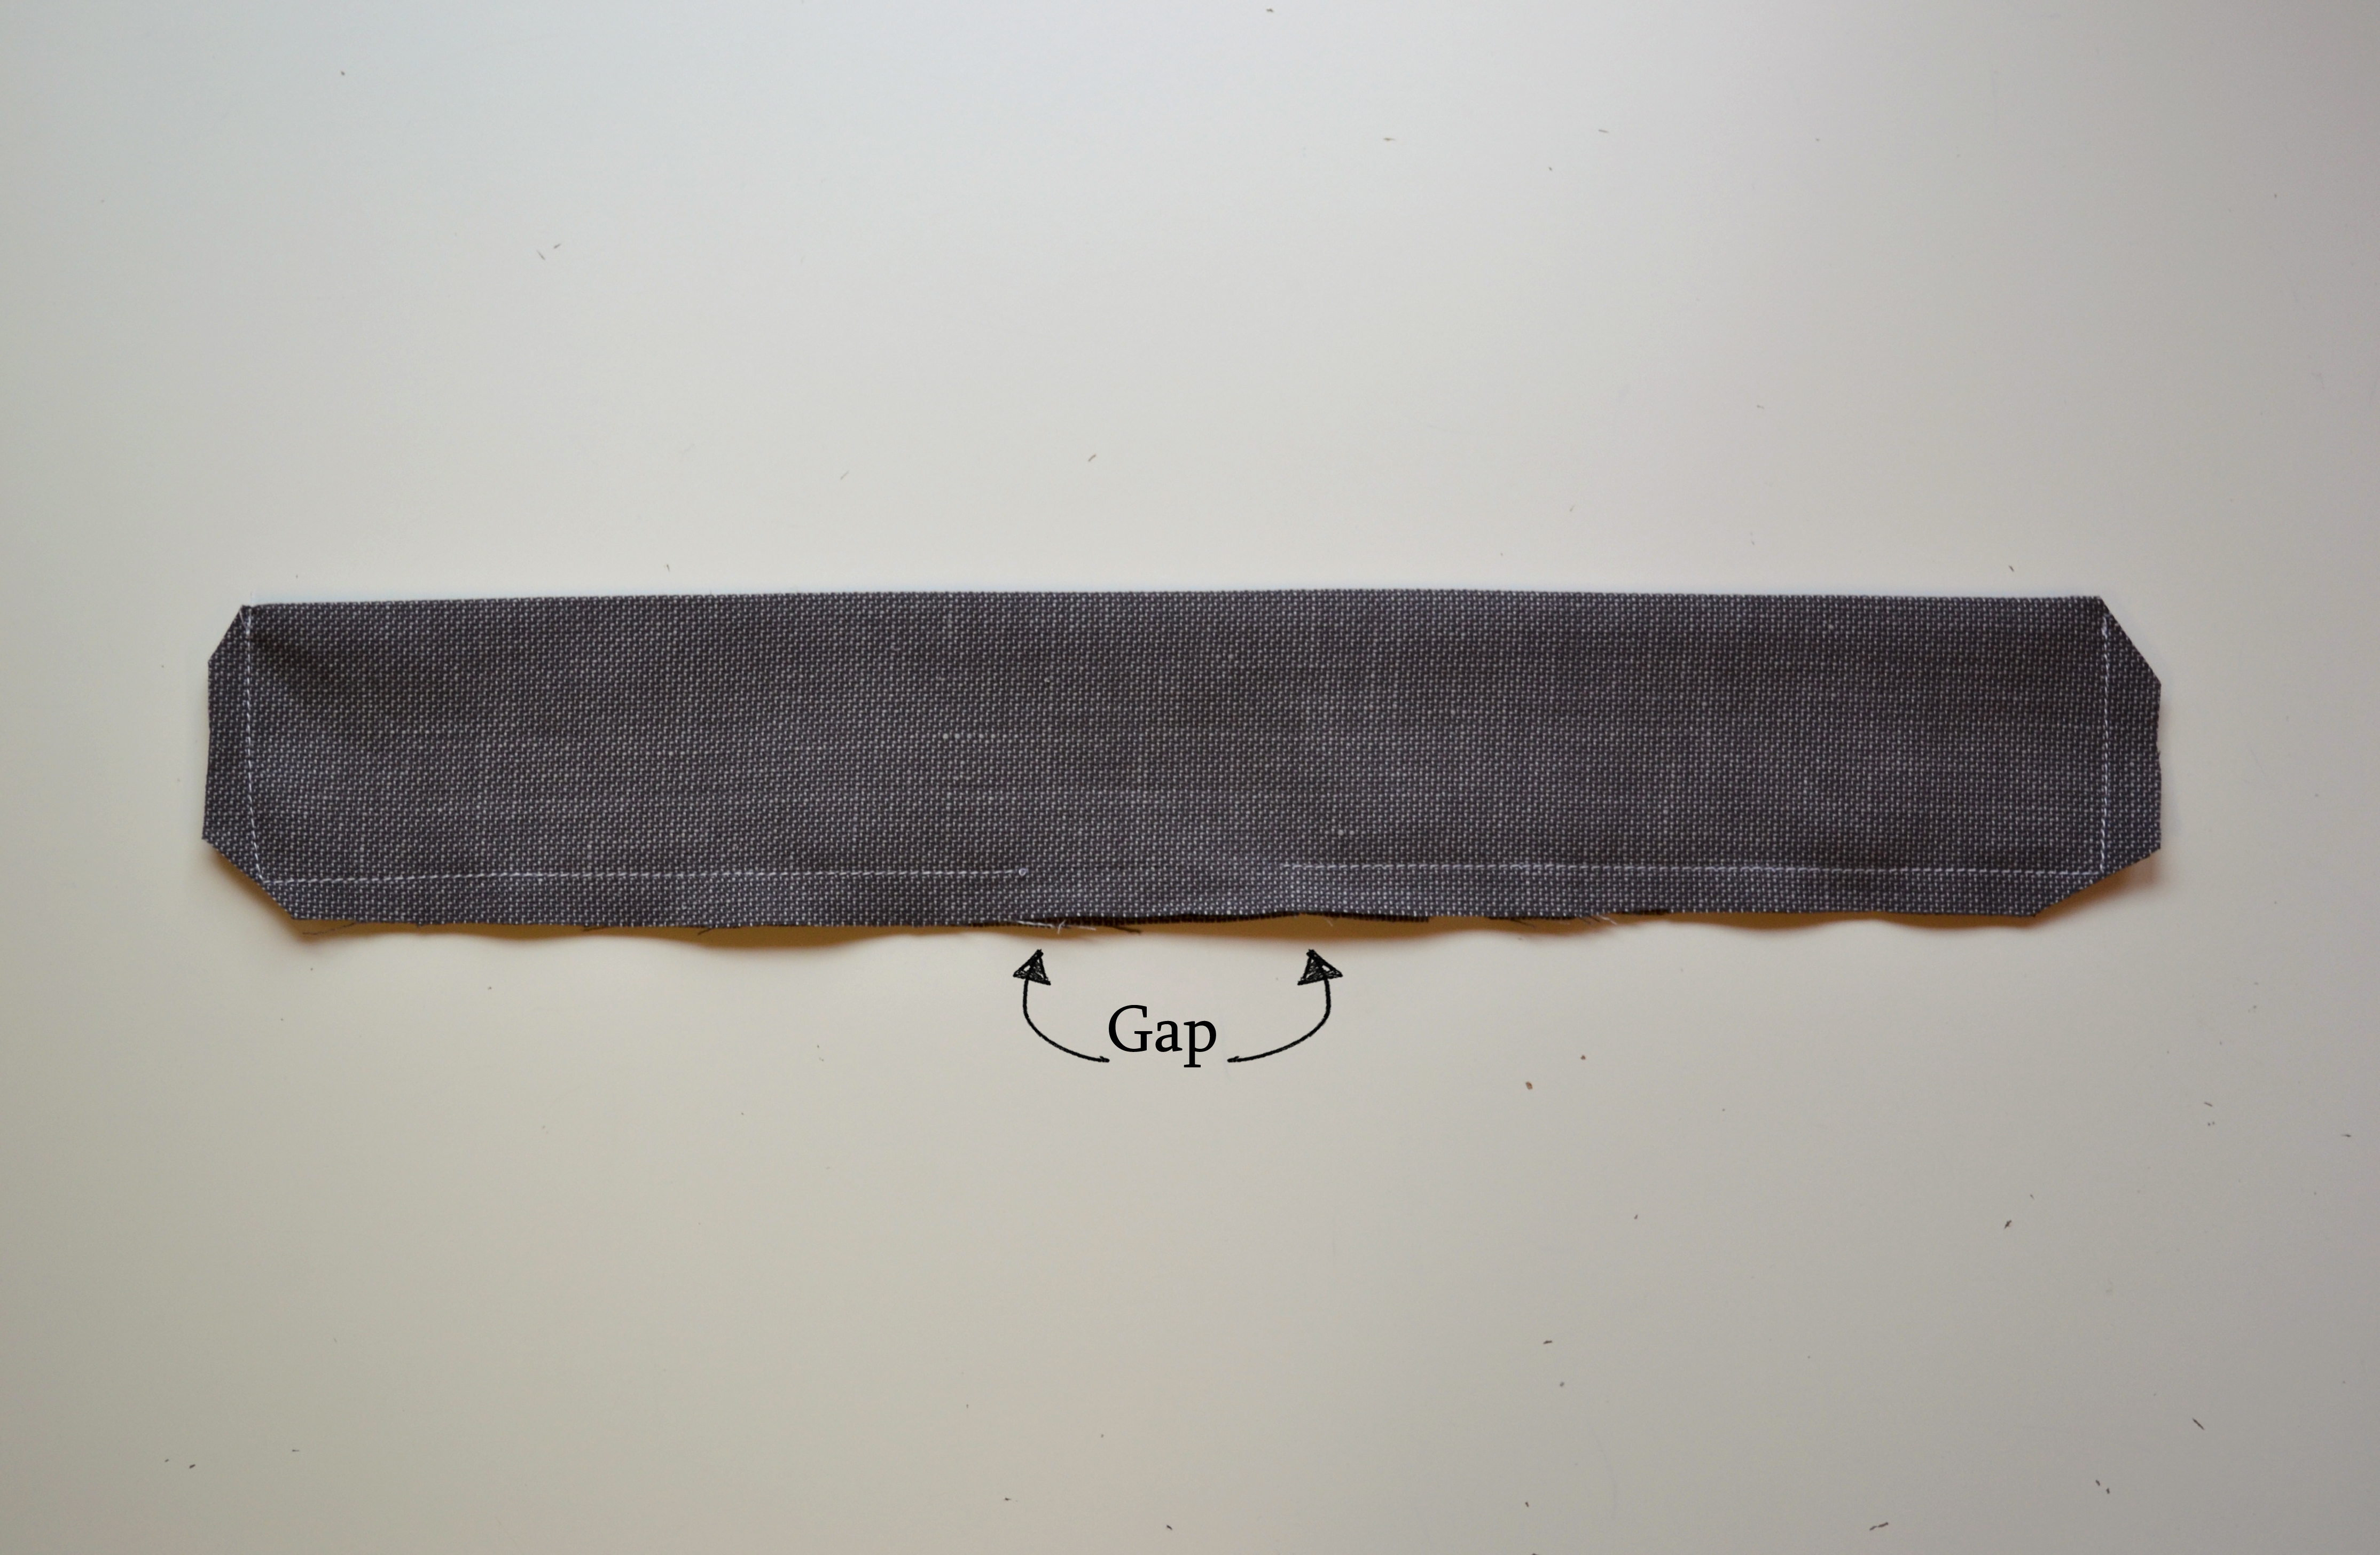
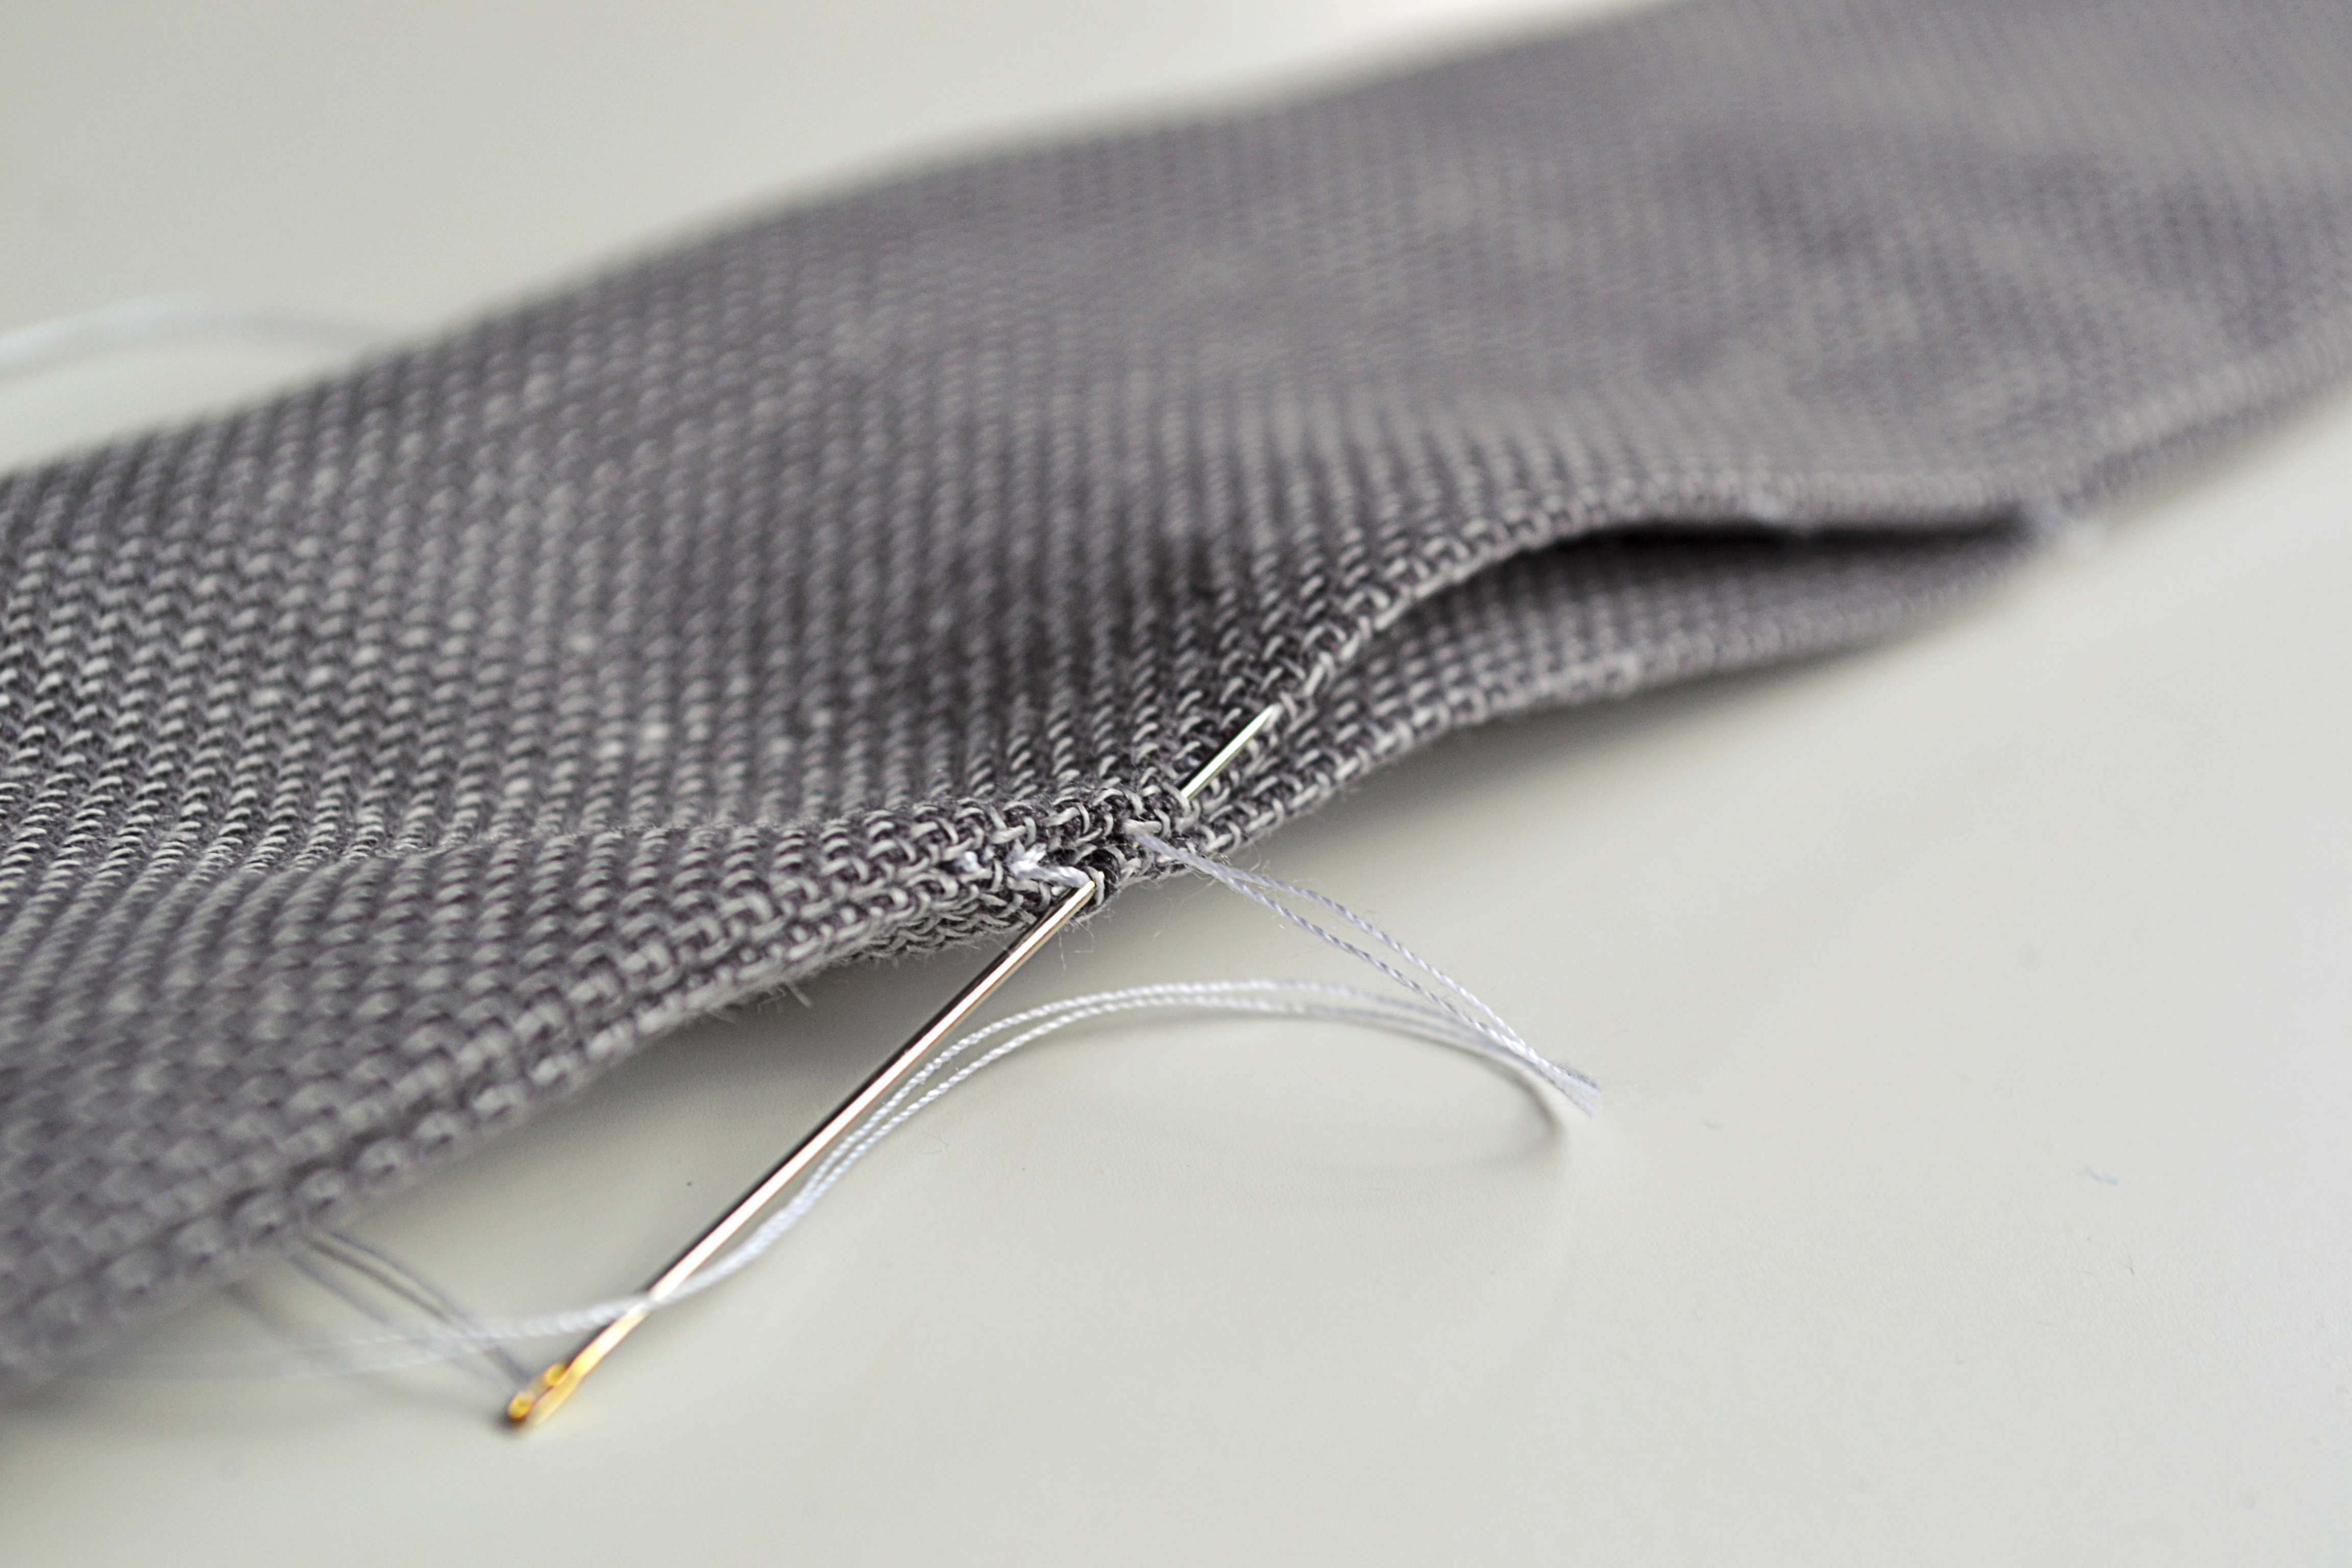
2. Clip your corners and turn through the gap to the right side showing. Hand stitch the gap with a slip stitch. Repeat on the knot piece.

Slip Stitch

3. Fold in half width ways and measure 6cm from the non-folded end. Then stitch together at 6cm.

Stitch Bow Tie

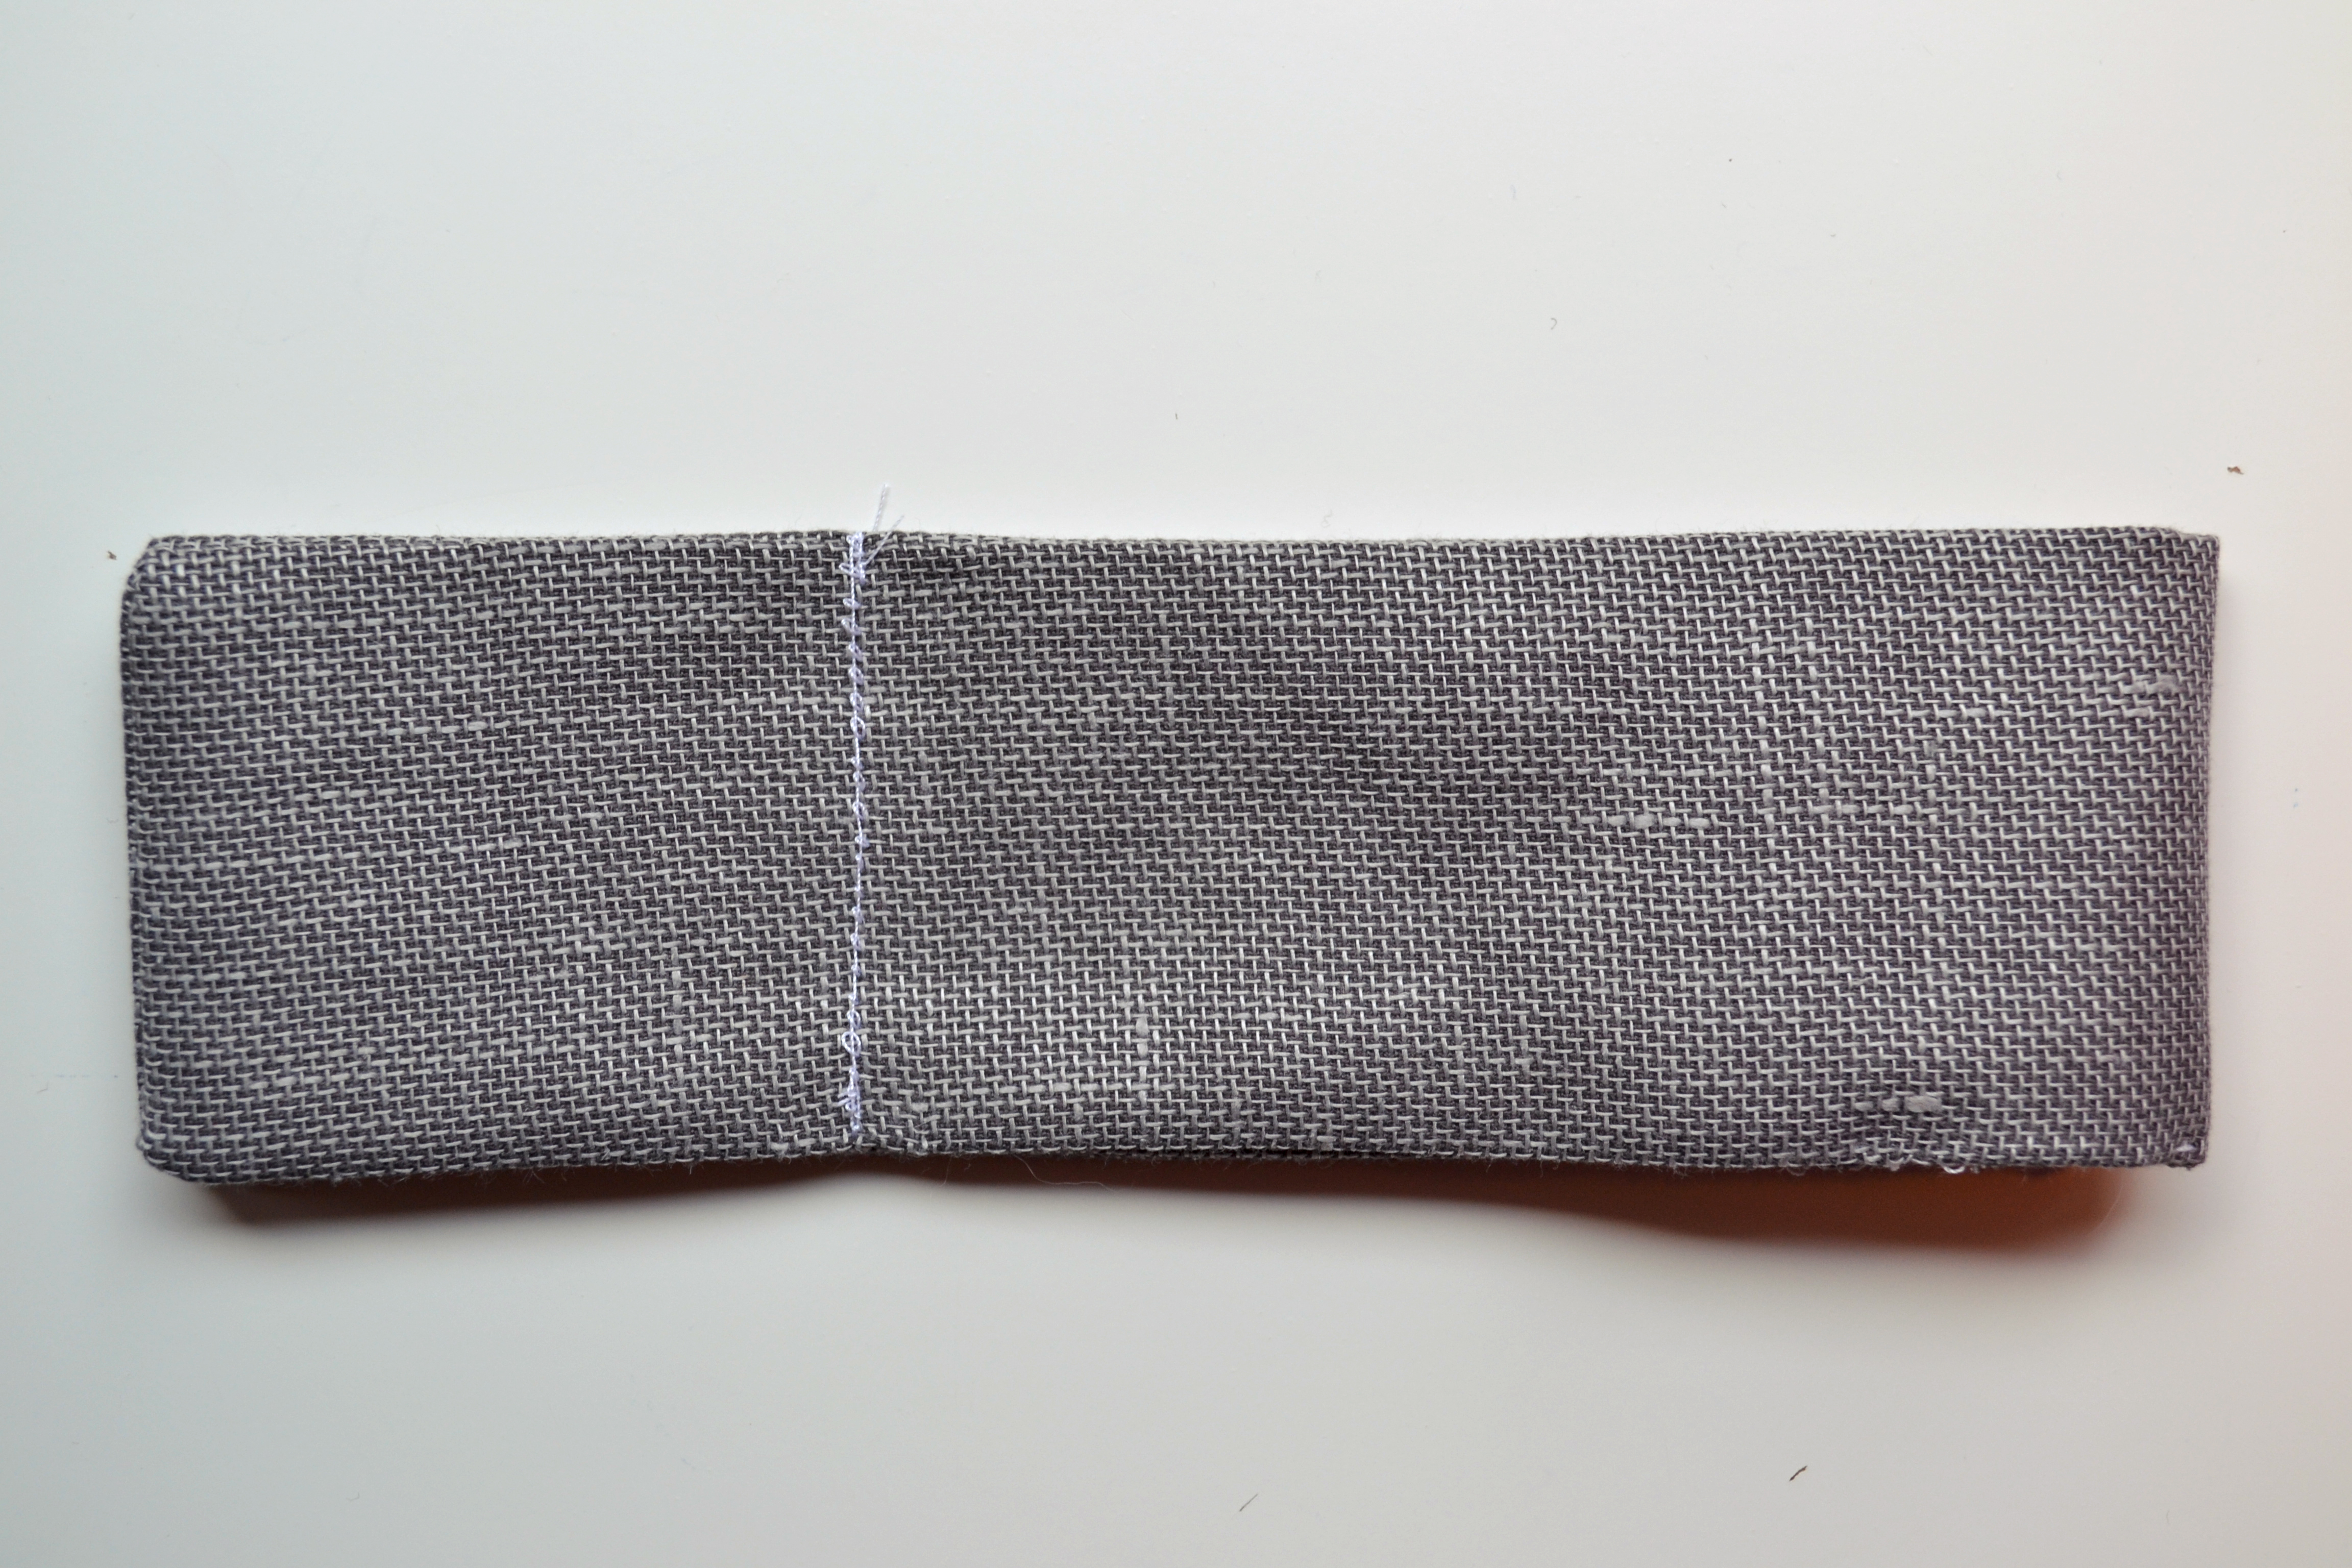
4. Open out the ends to bring the line of stitching to the centre…

Open Bow Tie

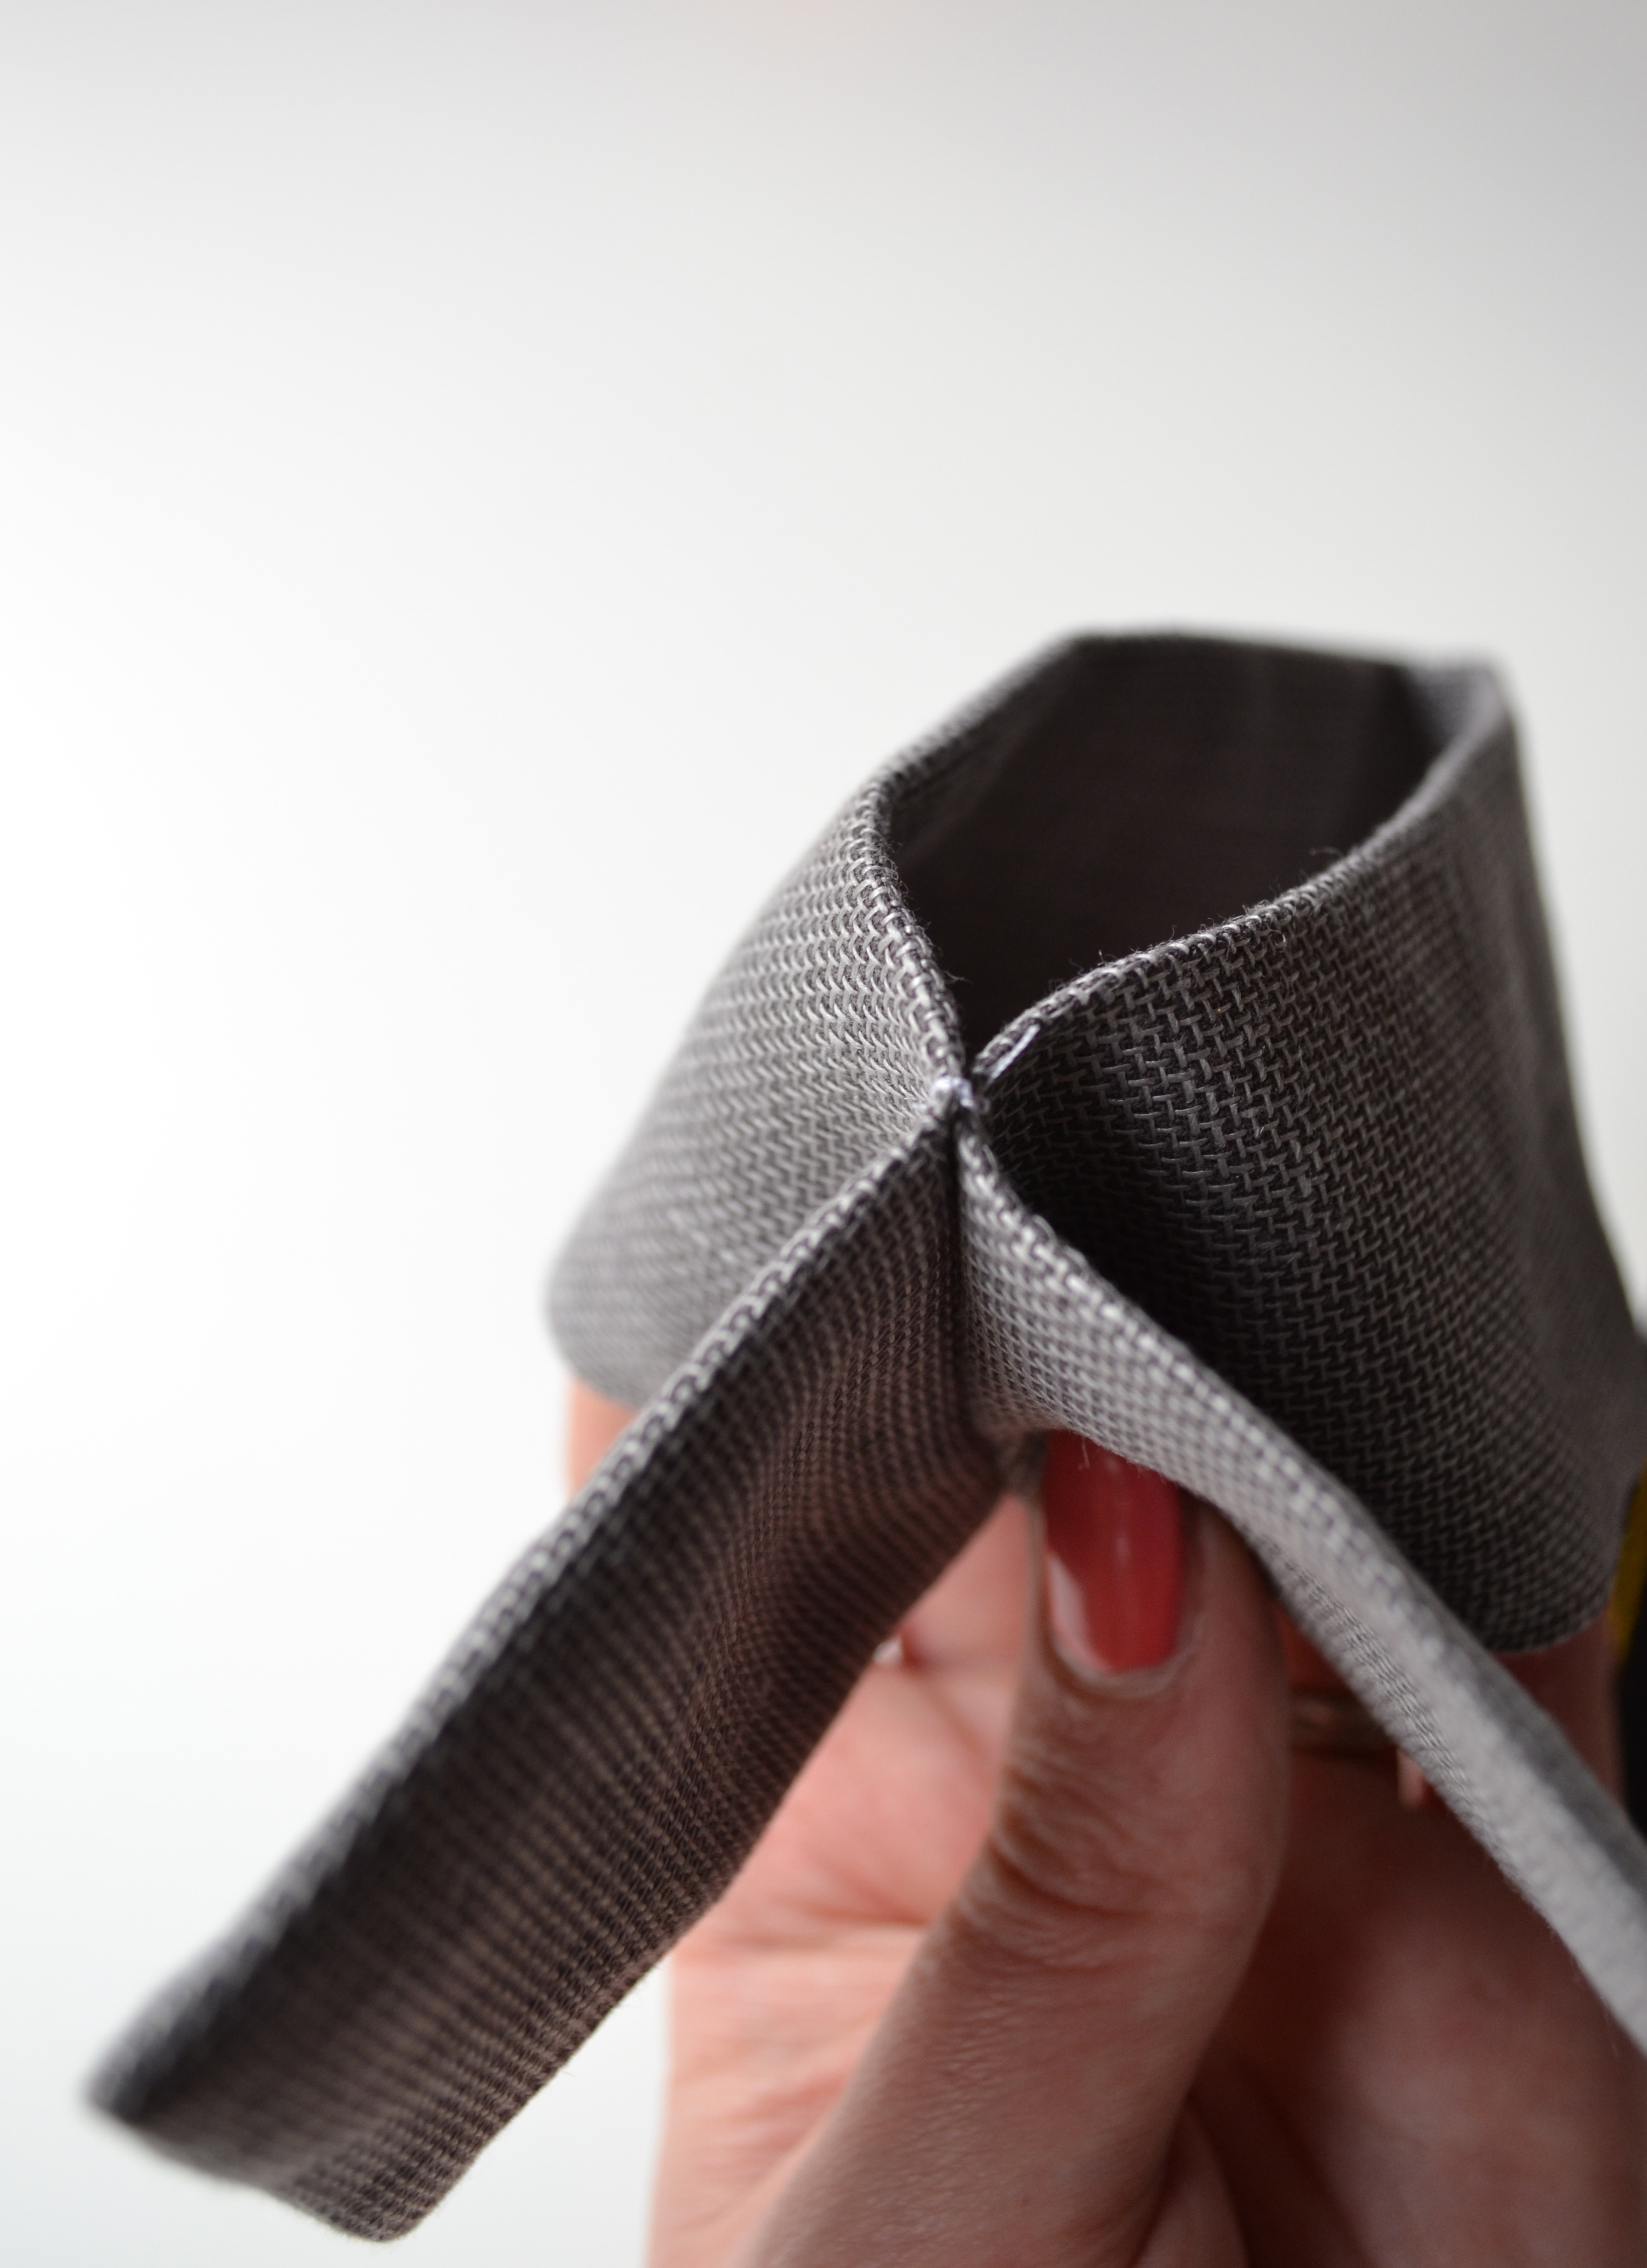
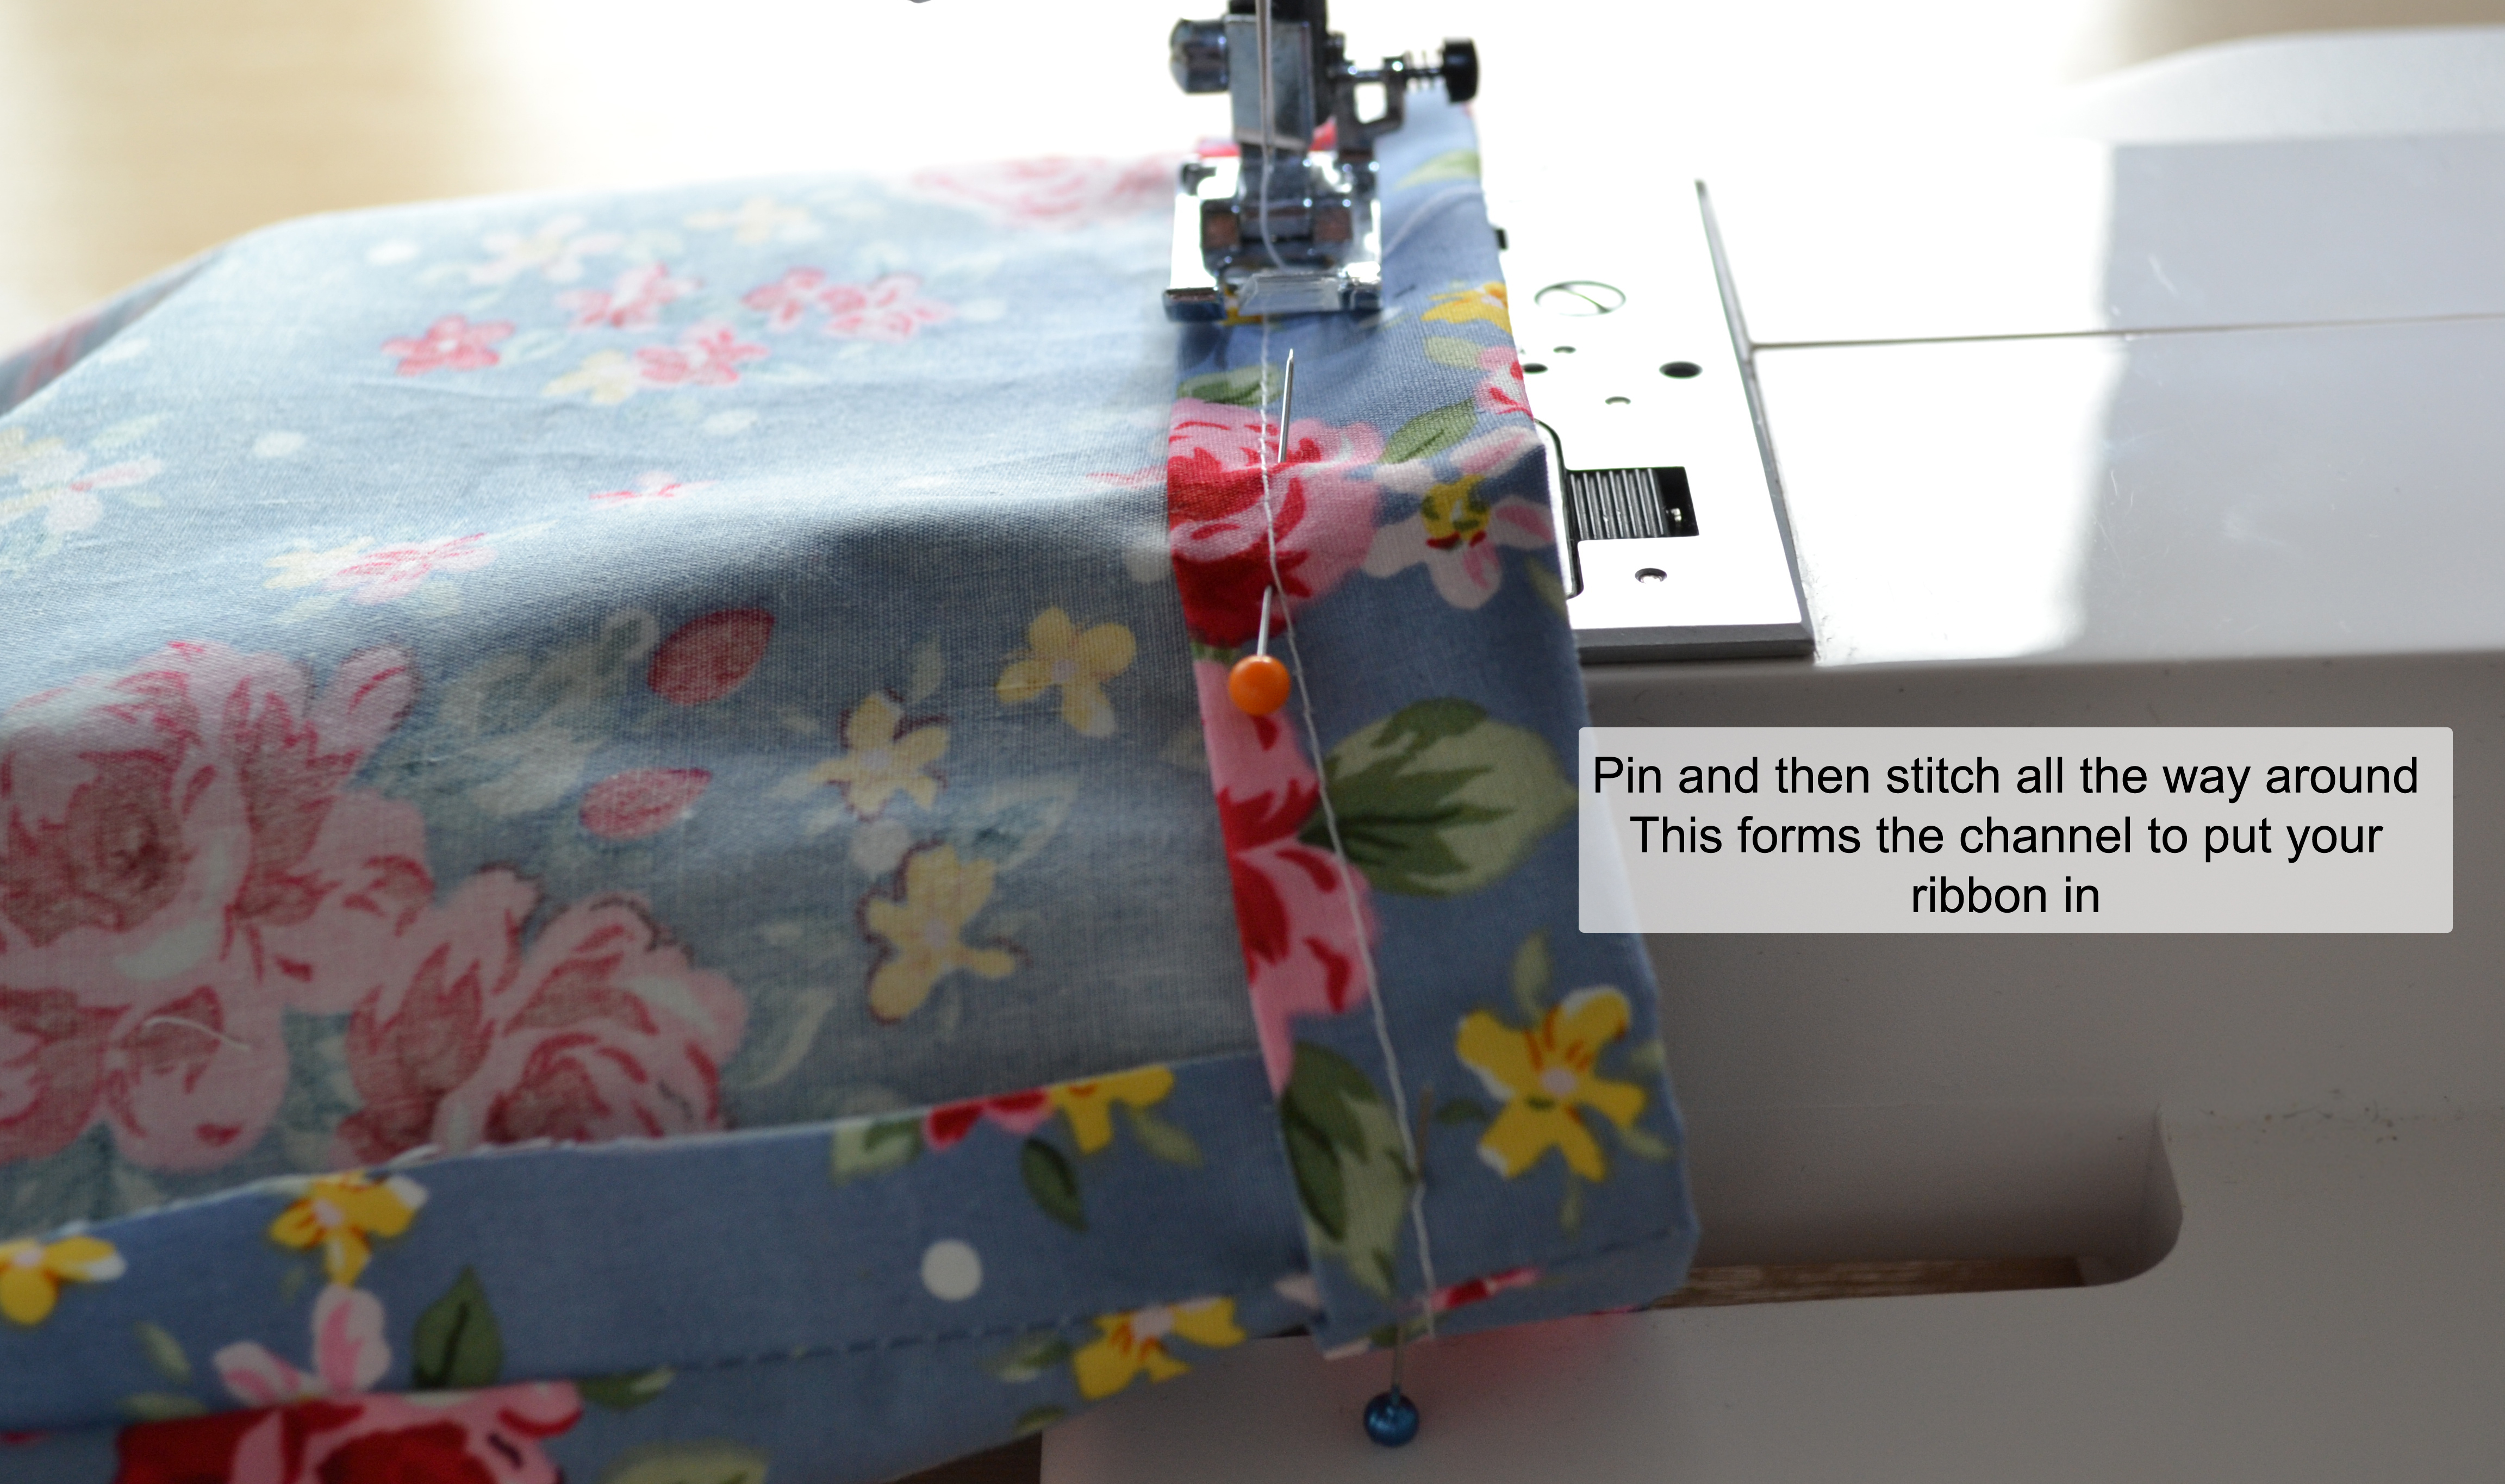
5. Lay flat and ‘stitch in the ditch’ to fasten in this position…

6

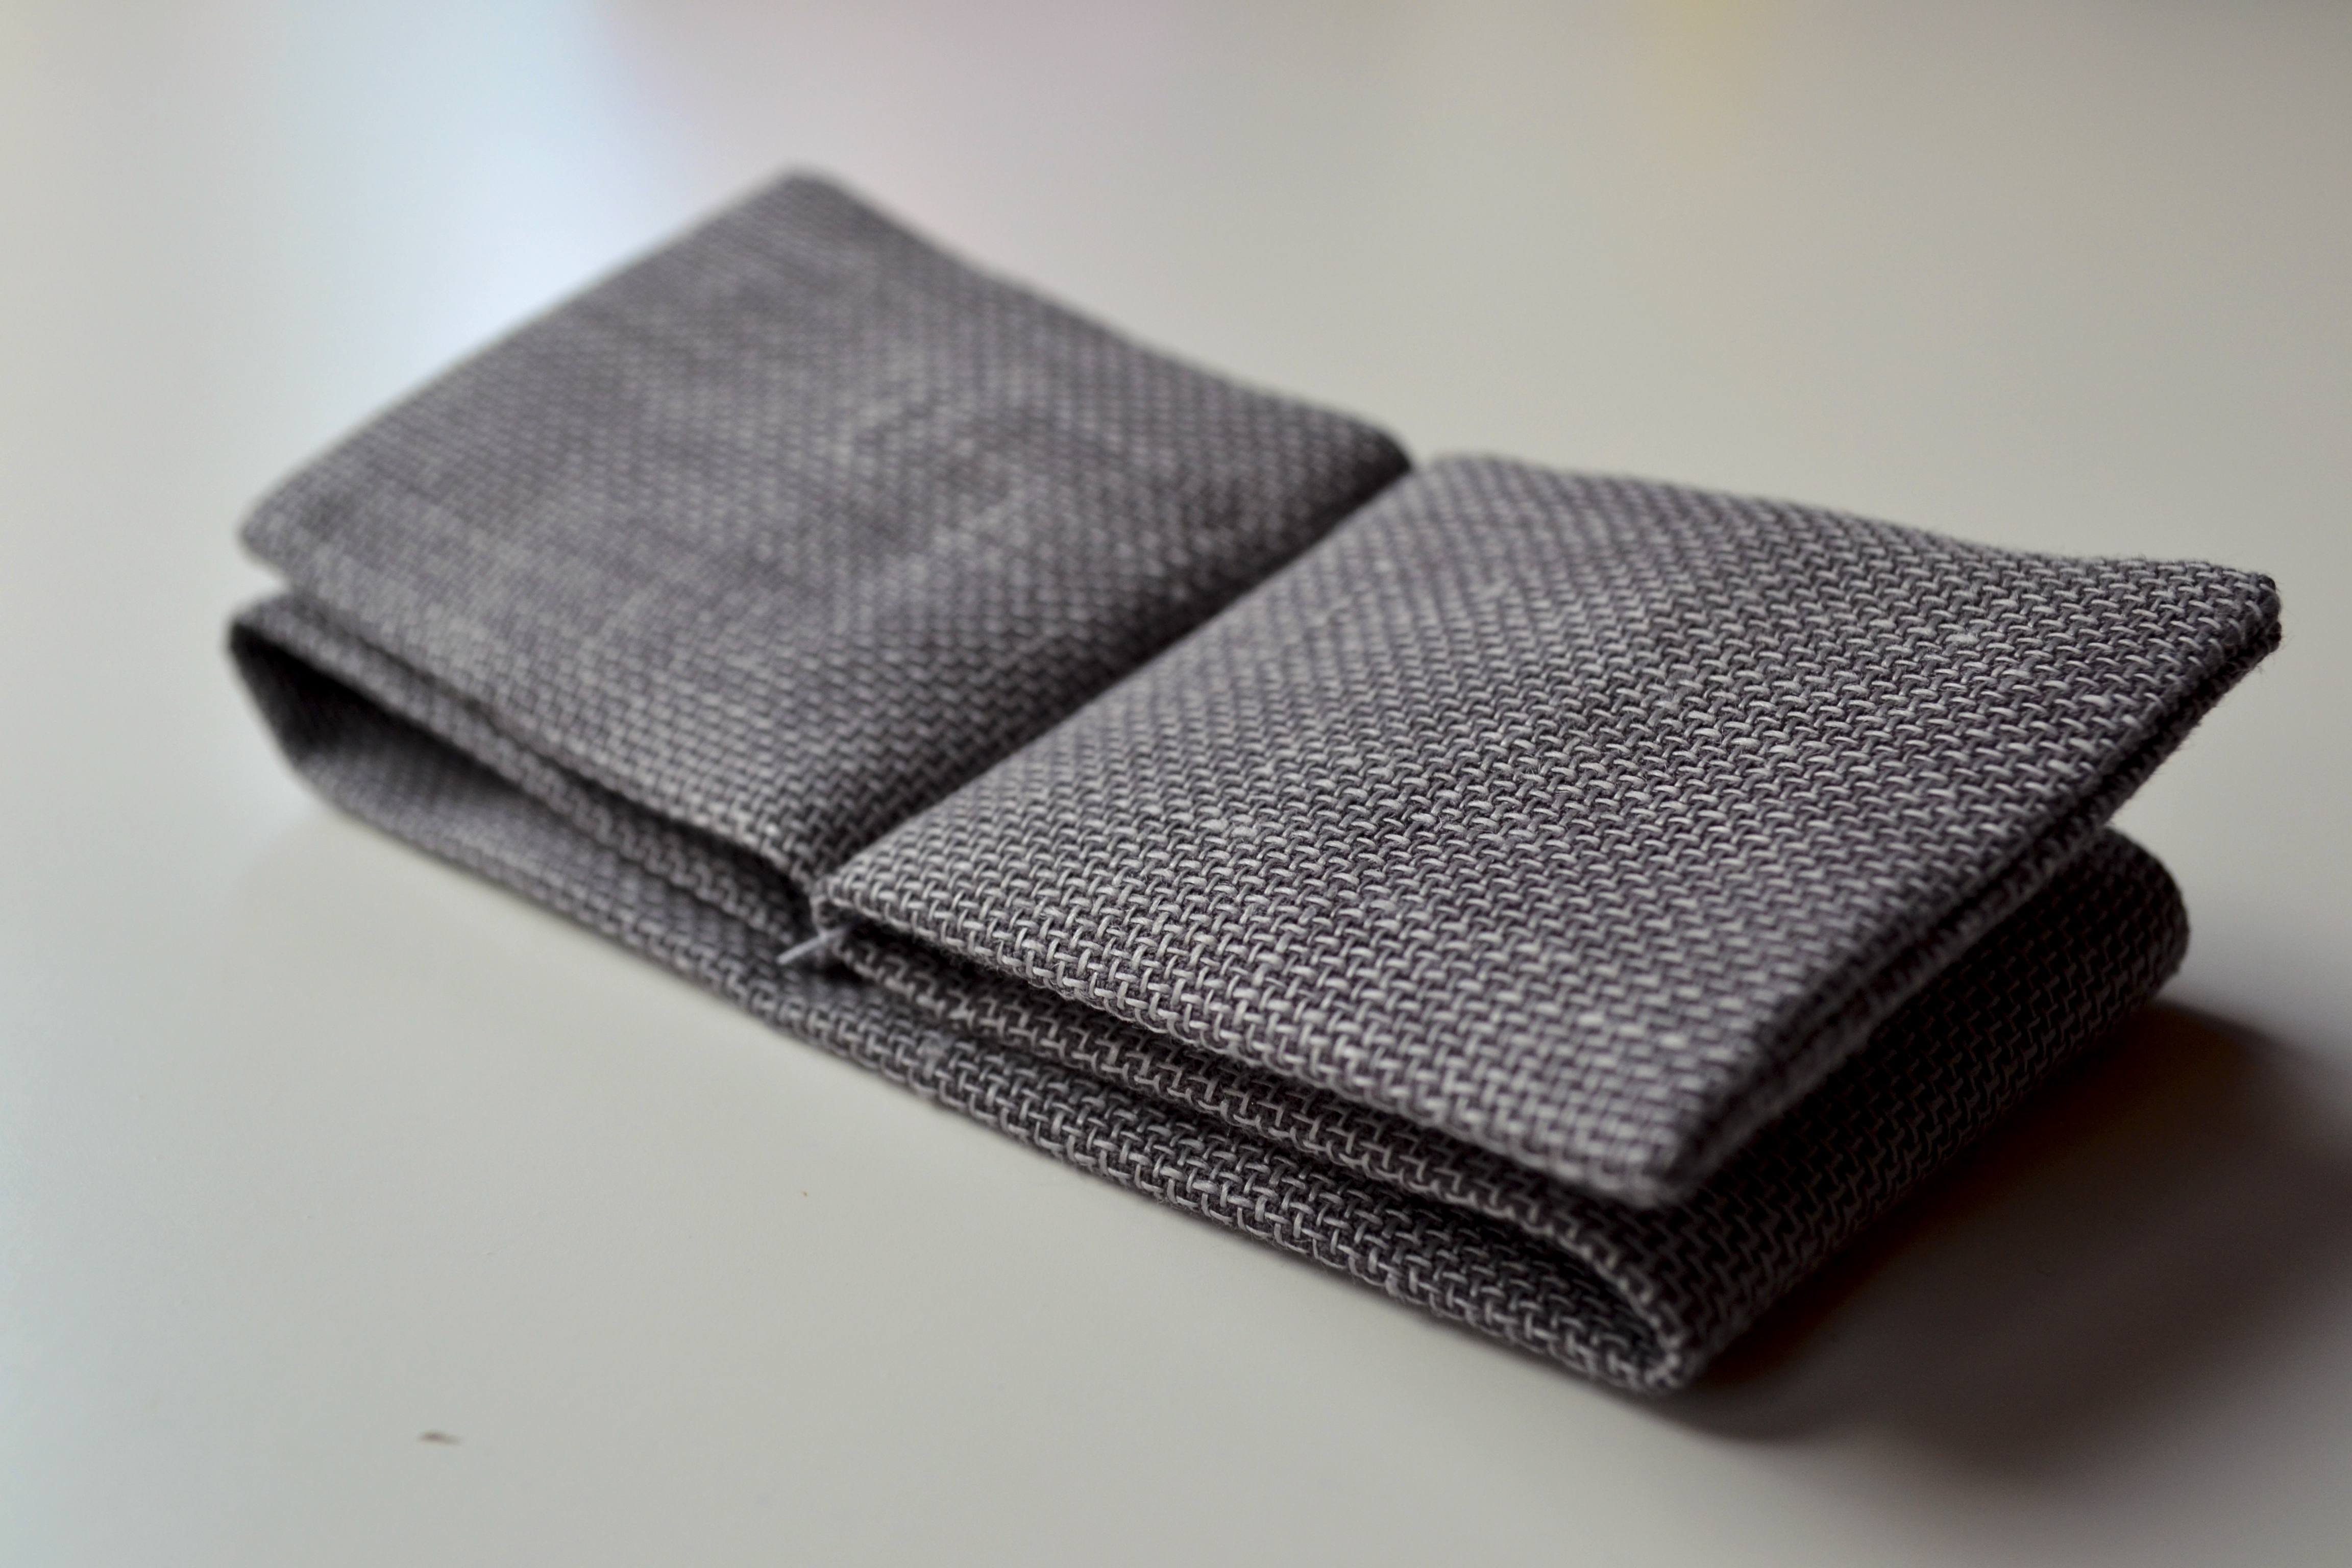
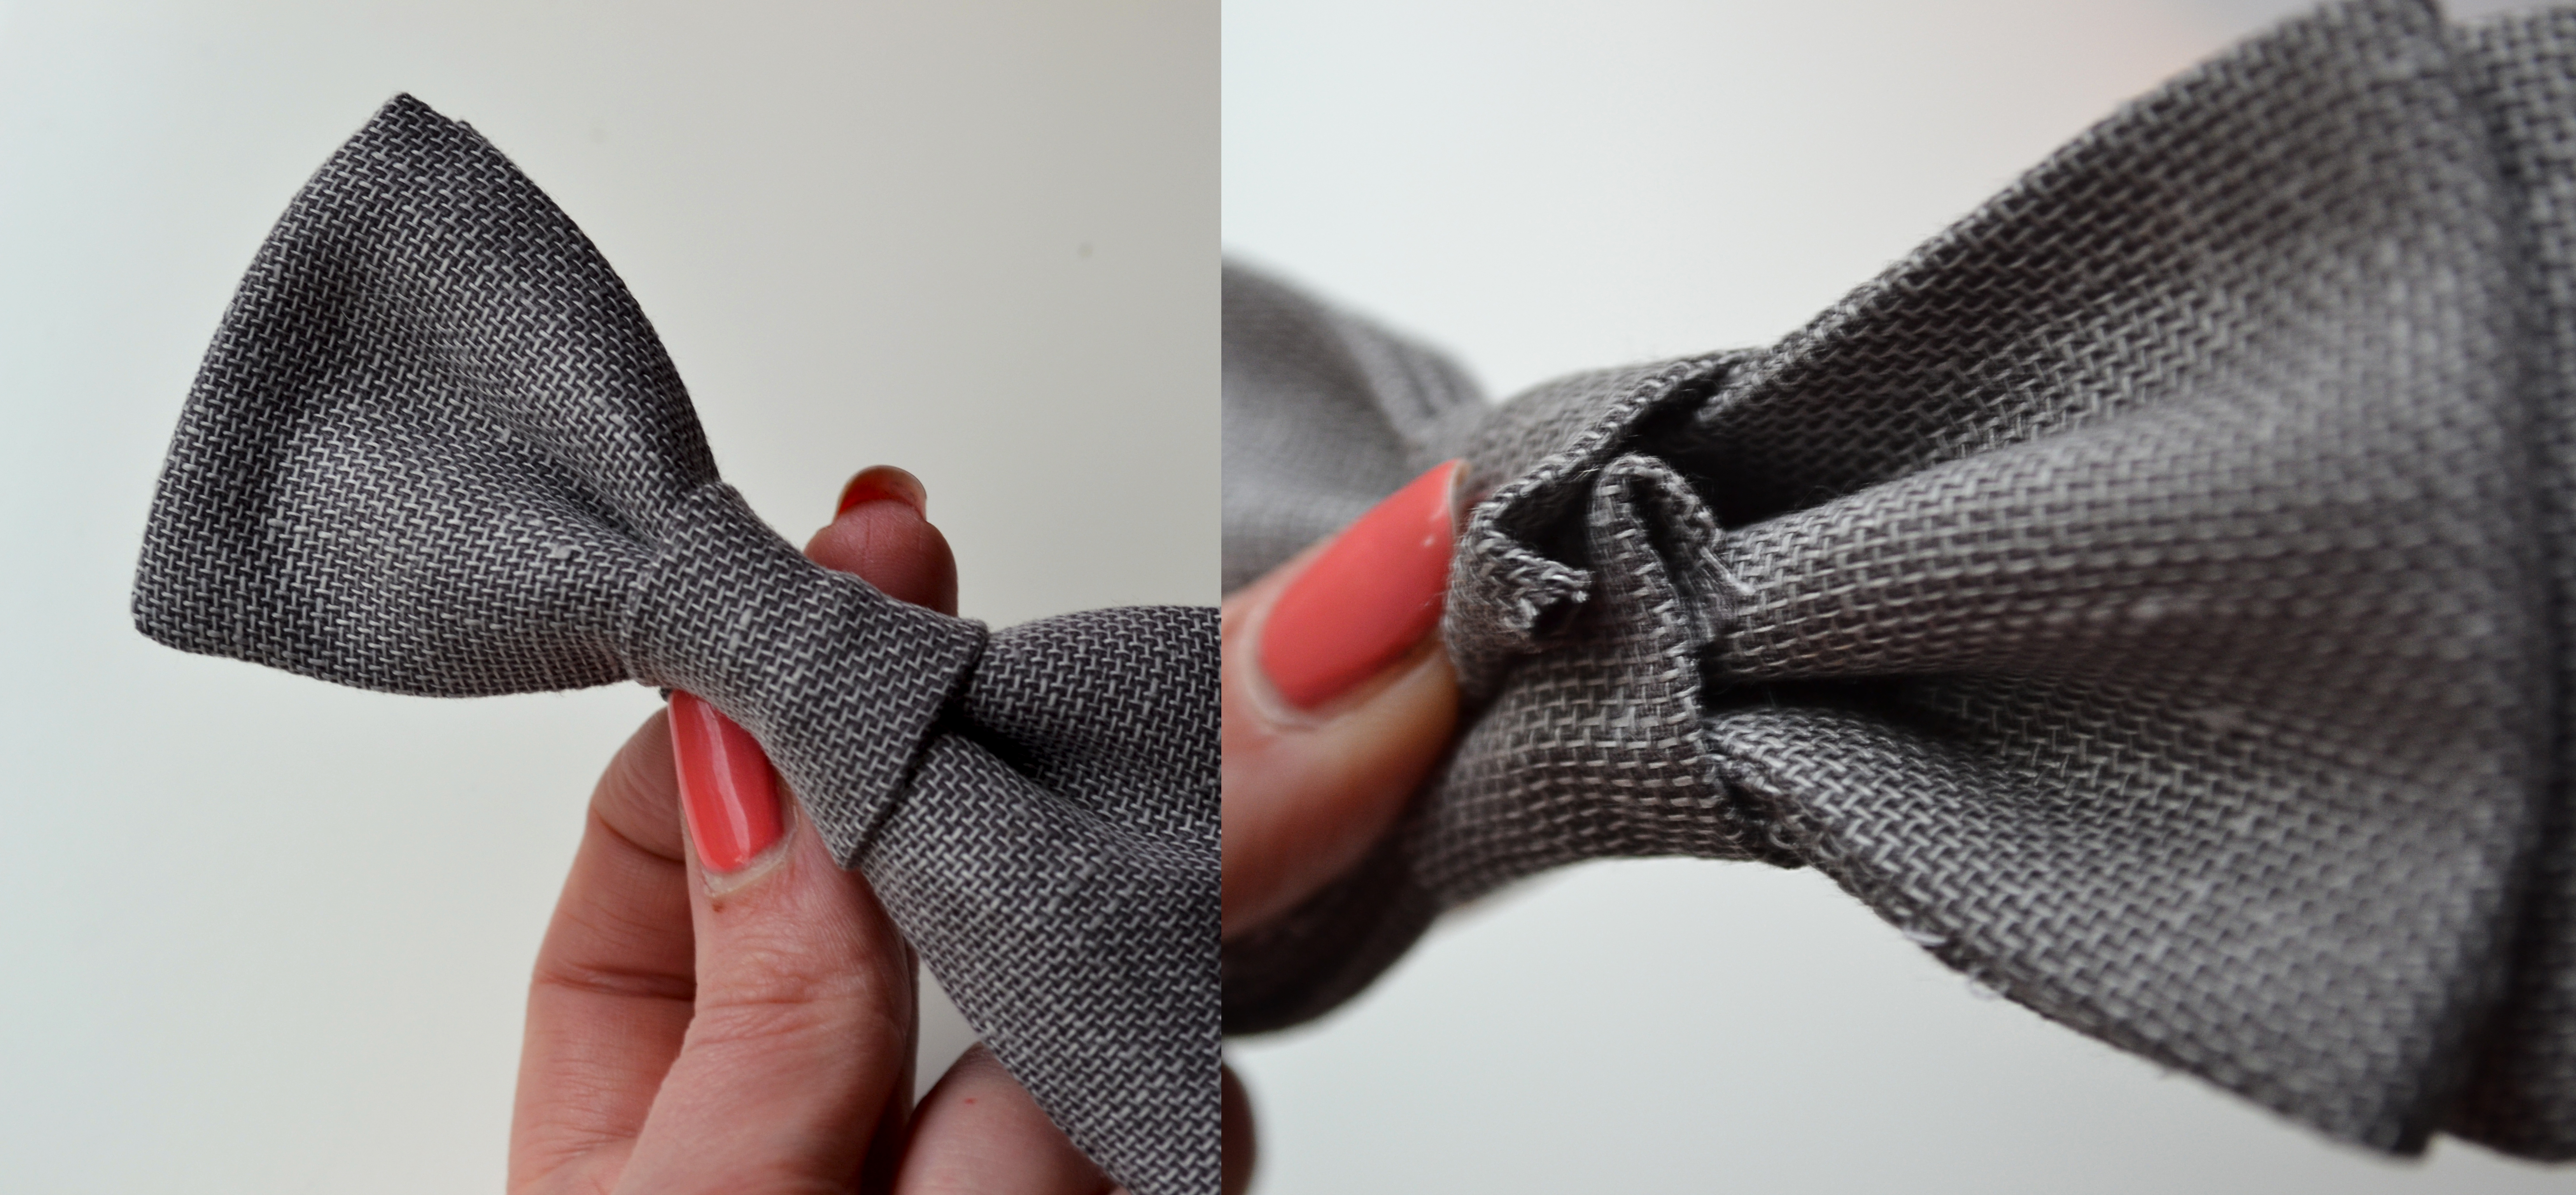
6. Pinch the bow tie to make a pleat in the middle.

9

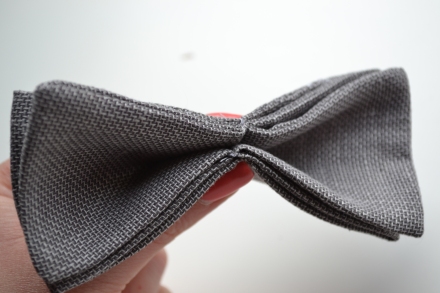
7. Wrap the knot around the bow tie and hand stitch to secure.

10

8. To make the band… with right sides together stitch the 2 band pieces together, leaving an opening at the non-pointed end to turn through…

7

9. Clip the corners, turn through and press. Then hand stitch the open end, closed…

8

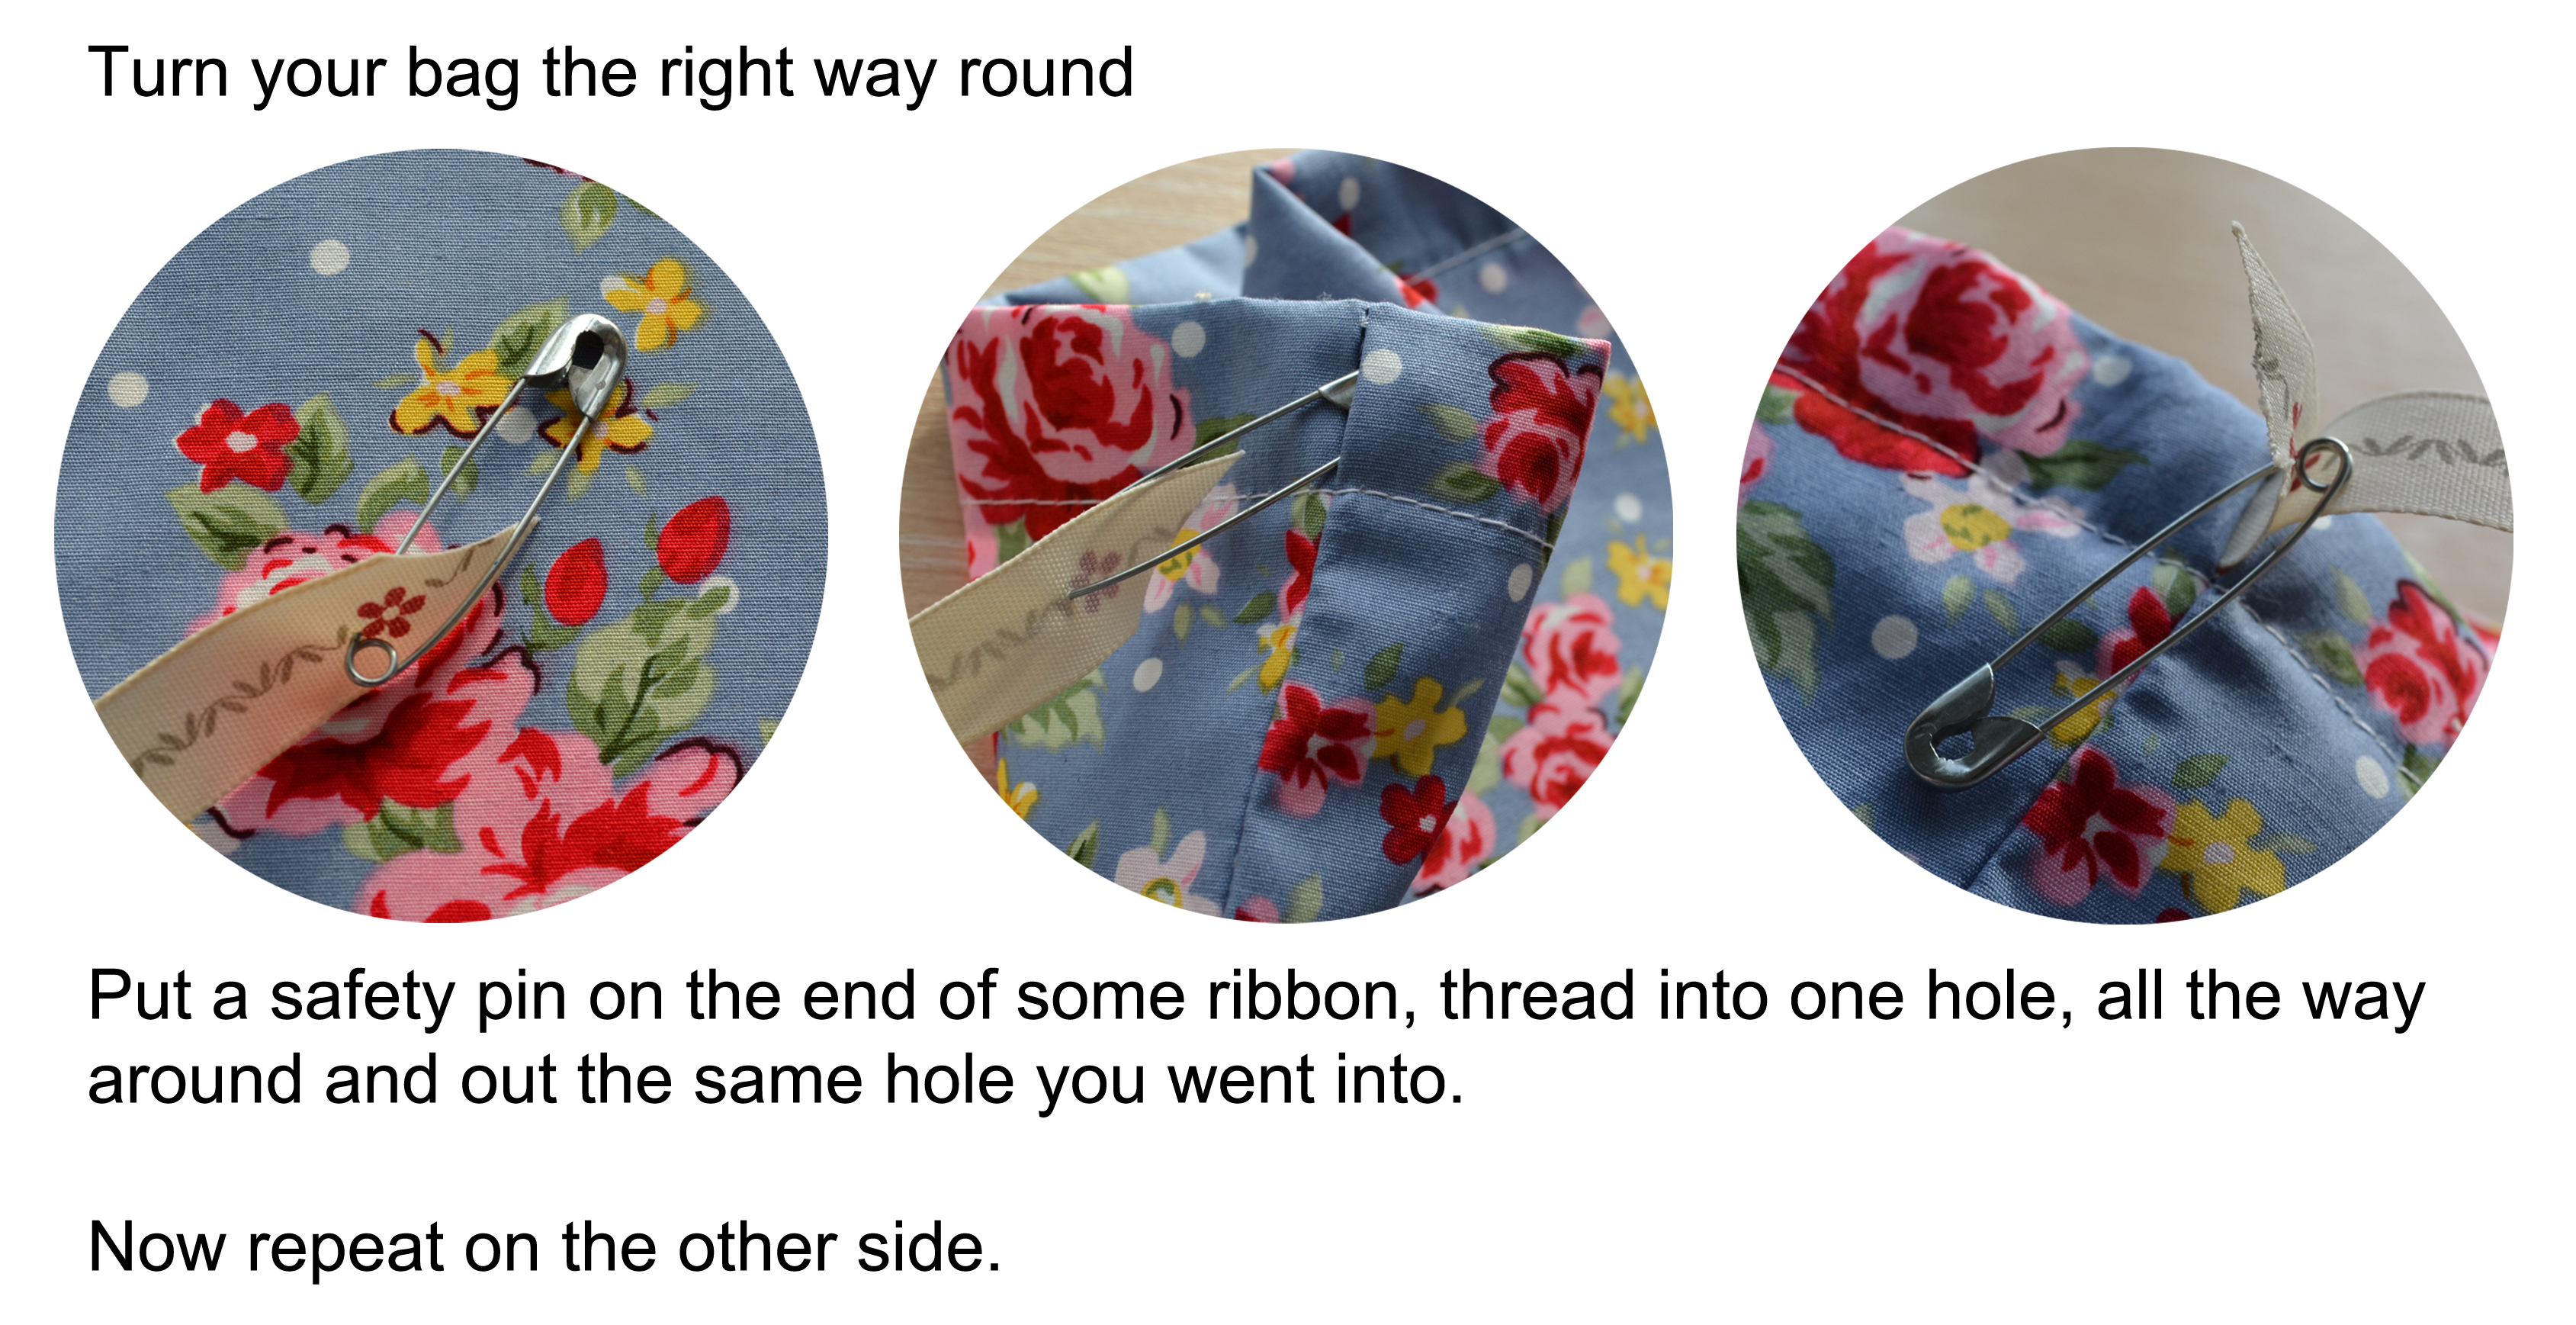
10. Thread the bow-tie onto the band and secure with a hand stitch if needed…

11

11. Add a popper at the end to fasten…

13

Tah Dah… You have made a bow tie! Package up in a pretty box and give to your man. I found it easier to leave the popper off until I had given the bow tie to my hubby so I could get the length of the tie fitting perfectly.

Bow Tie

How to make a simple drawstring bag…

Drawstring bags are one of my favourite things to make, one: because they are so easy, and two: because the possibilities are endless. A simple homemade drawstring bag can give any gift the personal touch, or make a messy toy room tidy again. You can use up small pieces of left over fabric, or it is great for Fat Quarters you may have stashed away somewhere. I love these drawstring bags and hope you do to. I would love to hear what you will be putting in yours…

Make a Drawstring bag

Just follow the steps…

Step One…

Cut Fabric Size


Step Two…

Hem Top Edges


Step Three…

Measure Ribbon Holes


Step Four…

Stitch your Seams


Step Five…

Press Seams and Turn


Step Six…

Stitch Top Channel


Step Seven…

Turn and Thread Ribbon


Now you have made your drawstring bag!… What will you use yours for? I have decided to give mine as a housewarming gift for my friend. My Dad keeps bees and she just loves his honey so I am going to give her some honey in my homemade drawstring bag… I hope she likes it!Gift with Honey

Pressing Flowers

If you have received some flowers today and like me love them when they are in bloom but wish they would stay that way forever… pressing flowers is for you. Its a true vintage hobby, with pressed flowers found in antique books… and it can become addictive.

Remember, its only good to press flowers which are in full bloom, but sacrificing a few heads from a bouquet is worth it.

Flower Pressing 2


Snip the head off one of your flowers. Open a heavy book and cover the pages with some blotting paper or kitchen roll and place the flower head inside the book. You can add some leaves in too if you like.Flower Pressing 6 Flower Pressing 4Flower Pressing 5

Close the book and rest more heavy books on top. Leave it for about 4 weeks or more and then your flower will be pressed.

All we need to do now is wait 4 weeks to find great ways to use pressed flowers…

Chinese New Year… Invitations

February 9th sees us entering the year of the snake in the Chinese calendar. I have never celebrated Chinese new year but this year I have decided to go all out. I will be inviting friends round for a meal with some festive touches to make it special.

It all starts with an invitation…

Chinese New Year Invitations

Now… I know what you’re thinking… isn’t an origami crane Japanese? Well yes, you are right but they look so cool and unique I couldn’t resist.

I got some origami paper packs on ebay and looked up this tutorial and folded away.

Origami Crane

Using some clear jewellery thread I threaded through the crane’s back, tying a knot at the bottom and top so the crane doesn’t slip down the line.

I used a parcel tag at the bottom as the invitation card and tried my hand at writing ‘New Year’ in Chinese to add a festive touch.

Origami Invitation with Tag

The perfect invitation people can hang in their window and get excited about the  party to come.

Final

Make Fruit Candles

If you’ve never heard of Alfresco Dining then you are in for a treat! Imagine a beautiful woodland, beach or lakeside area transformed for a few hours to host a private dinner party…

this is what we created when we were asked to get involved with Margaurita Photography and Our Munch for an Alfresco Dining photoshoot.

With Natasha from Margaurita Photography on her holidays at the moment we are guest blogging for her whilst she laps up the sun in San Francisco… Jealous?… Definitely!

And well… you wouldn’t know we were involved without a touch of DIY to add the finishing touches…

Here’s how we made candles from Oranges…

1. Cut your oranges or (any fruit you wish to use) in half and scoop out all the flesh from the inside.
2. tie a small piece of string (for a wick) to a stick and rest so the string hangs down
3. Pour melted wax into the fruit halves and leave to set
You can get wax beads from any good craft centre, I just poured the wax into an old pan over a low heat.
You can use any fruit you like, and it gives a great scent to the room… We think this would look great on a Christmas or Thanks Giving table too.
Keep an eye on Margaurita Photography’s Blog for the full pictures from the shoot.


Make a Button Peg…

The perfect accessory for your padded noteboard and great way to peg your notes to your board with a pretty twist…

Step 1. Drill a hole in a peg. If you don’t have a drill then bore a hole with a sharp point.  Step 2. Cover a button with your chosen fabric.  Step 3. Paint your peg and push the button stem through the hole in the peg.  Add some glue if needed.  Step four. Admire your pretty peg x

Make a Padded Noteboard

I am a note writer… notes on whats for dinner… what to wear… what to blog… so I was in desperate need of somewhere to stash them all and I had a very blank wall to fill in my sewing room! This padded noteboard did just the trick. I made a large one to cover an entire wall but you can choose your size.

I have used a staple gun (my new toy which I am obsessed with! Anything which wasn’t stapled down… it is now!) But you could use pins, tacks or nails.

Voila!… your life is organised… well your scrappy notes are at least!

We think this would make a great present too, if you made a small one for someone.

x